Studio Notes 19/07/19

This has to be a bit hurried, as I’m so, so tired…

After a week of experiments, I’ve produced my best cast yet, and it was partly down to a surprising find along the way. No, it’s not what I consider to be perfect, but I fixed the problem of the mould not filling all the way. Anyway, here’s the story of that find:

Into the spidery shed

The springform cake tin was a great idea for keeping hold of a round mould, but RTV silicone doesn’t like to be cast on its side – it won’t vent steam like oil bonded sand will, so it just forms mega bubbles, even with an incline. It has to be vertical.

That meant that I had to clamp it in place vertically and apply pressure on the sides to keep the mould tightly in place, or else all my pewter would just dump out into the bottom of the cake tin.

I was trying to come up with some system for jerryrigging a clamp – maybe a car jack wedged into a box? – and got Ste on board to excavate a box from our spider-riddled shed. As the spider-spotting backup, I was peering into the dim wooden cavern when I spotted a box we hadn’t seen before.

It was an unopened clamping table!

An unopened Wolfcraft 150 clamping table found in my shed.

The exact model isn’t made any more, but this is the closest version.

The previous owners had obviously abandoned it to the eight-legged shed denizens, and somehow I’d never seen it before.

Although the nuts, bolts and plastic pieces were still sealed in their plastic bags, there was a fair bit of corrosion and that dank shed smell. Still, I put it all together the same day. It needs a bit of oiling and messing around with to help it fold up, but set up, it’s just right for the job.

I can’t believe that I just happened to find the exact thing I needed! I couldn’t have done the casting without it.

Tips for pewter casting

I’ll have to write this up as a separate post, of course, but here are this week’s discoveries:

  • Fill from below. When you pour hot metal into a mould, you create turbulence in the flow of the metal – steam, bubbles, slag, all rolling around. You need to cut this out, and to do this, you need to fill your mould from the bottom up. This means having a separate pouring spout that feeds your mould from below.
  • Use a tapered sprue. This helps to reduce turbulence as well, controlling the flow of the metal.
  • Make your sprue big enough. The metal may freeze before filling the mould if you don’t.
  • Plan your sprue and gating system into the mould making process. I didn’t do this… I did rely on the fact that I could cut the silicone afterwards, which is less than ideal, and means that I’ve had to patch some bits with oil-bonded sand.
  • Wax acts as a flux, but don’t add too much. Pretty self-explanatory.

Now that I’ve achieved this week’s goal, I’m going to carry on with another job: helping my husband create some of his own moulds. I’m refining my DIY silicone mould-making technique and scoring major brownie points at the same time!

Last week

Next week

Studio Notes 19/07/19

Studio Notes 12/07/19

Good news – my self-published paperback journals arrived and they look great!

Mould making, like home baking

One of the things I had to do immediately when I poured my new silicone mould was to figure out how to actually pour liquid metal into it without ending up covered in liquid metal. It’s a pretty important thing to work out.

Beforehand, I used to rely on clamps, straps, screws or bungee cords, but now I have a system – a springform cake tin.

Yes friends, it works. I made the original mould in a biscuit tin (there’s a clear food trend here, I know) but I was forced to cut the tin away to de-mould it. So with that gone, I had to use some DIY acetoxy cure silicone to bulk up the high temperature silicone mould and keep it rigid inside the springform tin.

If you’re going to do this, remember that you have to make the DIY silicone second. You can’t pour this high temperature silicone into or onto an existing acetoxy cure silicone form, because the acetoxy cure silicone will stop the high temperature silicone from curing properly.

So far I’ve been experimenting with vents and gates, and pouring inclines – trying things out to see what I can get away with, and which methods give which results… all to figure out how to control the process as much as possible.

I need a hotplate…

Last week I coated my kitchen with wax and this week I’m back to melting pewter. I really need to get a tiny stovetop to live in my studio, but I don’t know if an electric hotplate ring will do the job for heating pewter.

It’s so easy to adjust the melting process with a gas flame – I don’t know if an electric ring can do as good a job with my wonky pound-shop bought pots that probably don’t have flat bottoms any more.

Is that going to be my next purchase? Maybe, maybe not – let’s see if I get evicted from the kitchen by the end of next week.

Last week

Next week

Studio Notes 12/07/19

Studio Notes 05/07/19

I got that push to finish and publish my second journal, and do you know why? Because I made a massive mistake with casting my coin and had to do something with myself while I was waiting for more silicone to arrive.

It seems as though I’m mostly reporting on huge failures, doesn’t it? Well, that’s what it feels like to me sometimes!

Still, at least I have enough to get on with to fill in the gaps when things don’t go perfectly.

Mould making, the right way

Confession time – I know how to make two-part moulds, and I know how to make even more complex, multiple-part moulds. I’ve been doing mouldmaking for 20 years now, so I have a handle on the basics… so what the heck is up with my recent run of catastophes?

The simple answer is that the silicone I’ve been using has given me the option of being lazy, and faced with that option, I’ve grabbed at it with both hands like a desperate woman.

Why lazy? Well, you can cast a solid block and then cut it apart, unlike with plaster. Working that way around, what happened was that my pouring spout was too narrow to accommodate an adequate flow of silicone, so with an 8 minute pouring time, I ended up with a lot of silicone that had gone off before I could use it.

Fast forward a few days and another batch of silicone, and I made the mould the right way. Don’t be lazy, kids.

Prepping for a new casting project

I’m not just working on the coin, though. I’ve got a plan for my soap base in mind, and my poor plastic artist’s assistant is getting roped in as a model.

Right now I have to pull up the handbrake on work though, as the studio contents have spilled over (in some cases, literally) to the rest of the house and I have to scoop up all of the leftover silicone that’s been chipped up for recycling and clean off all of the wax I tipped over the cooker and the kitchen floor yesterday…

Will I get to cast the pewter next week? Maybe, but maybe I’ll work on prepping the rest of the things I want to cast at the same time. We’re looking at getting or making a casting flask for sand casting, so I may work on that instead.

Last week

Next week

Studio Notes 05/07/19

Studio Notes 28/06/19

Although I’m still pushing to get my second journal finished, I do feel as though it’s been a productive creative week. The written content for the journal turned out to need a lot of research and updating, and the formatting had to be totally different from the first one, so it couldn’t be rushed.

Hopefully next week I’ll have finished the interior and I’ll be ready to move on with it.

Finger knitting…

As a nice, distracting aside, I learned how to finger knit this week.

Am I actually going to get around to using this new skill any time soon? Hey, who knows – I just like the potential recycling/upcycling applications.

Fred wrapped up in finger knitting on vintage sewing machine case

Creating a new coin model

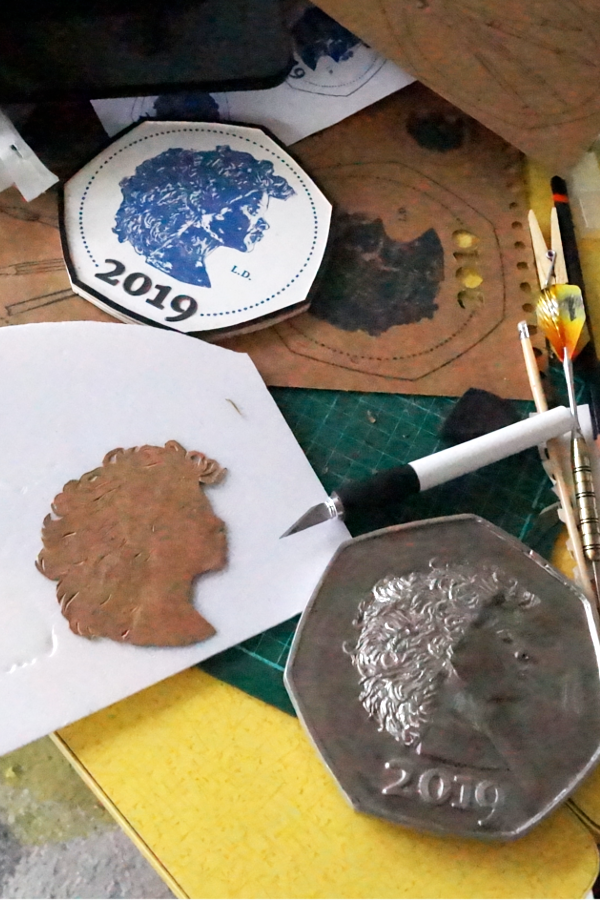
Thanks to my new cutting machine, it’s been much easier to re-create my coin for moulding, and it looks even better this time around. Out of disaster came improvement, so I’m quite happy about that.

My next step is to give it the final touches and use the high-temperature silicone I bought in April to make a mould of it.

Last week

Next week

Studio Notes 28/06/19

Art Supplies Haul – May 2019

You can tell I’m back into the sculpture phase of my work. I tend to buy ahead of time and have my supplies sitting around for a bit, but with these purchases I decided I needed them right away.

African Black Soap Base

More soap sculpture? Oh yes.

Since Use Him in 2013 I’ve been thinking about doing some smaller scale sculptures in soap, and it suddenly hit me that I had to get the right stuff in to have on hand for that time when I could jump right in to it.

This is definitely the stuff I need – 2kg cost me £13.45. It’s going to look at me judgmentally from its spot on the shelf until it forces me to make the darned thing happen.

Composimold

I found out (fairly late) about Composimold, a food-safe mould-making material that can be melted down and re-used up to 35 times.

This is great for the way I work, casting positives, then refining them and casting them again. I could have saved a lot of money last year if I’d have known about this! It cost £46.99 for 40oz.

40 oz Composimold - cheapest on eBay.

However, it hasn’t exactly been plain sailing with this Composimold – I got it badly wrong and my first mould was a disaster.

I hadn’t counted on the water content of the material itself and left my paper model in it for way too long. Also, the melting point of the Composimold was too close to the wax in the model.

Next time.

Rasps

I happened to be in Aldi a lot back in May, so I was poised to find some great deals on their special buys.

When I saw a set of metal files for £5.99 I knew I had to have them to work on my next pewter casting – not having any rasps makes metal work very difficult!

Aldi's pyrography set and metal files on patterned rug

Pyrography kit

In the same trip I picked up a fantastic pyrography kit for the unbelievable price of £7.99.

Now pyrography as a craft isn’t something I’m terribly interested in, but it’s the potential applications of a hot branding tool that make it an essential for my current work.

I’ve been using it to model paper and wax sculpture – it’s surprisingly good for shaping and burning away kraft paper layers, and I’m so glad I didn’t leave it behind!

I’m very pleased with what I did manage to pick up over the month – now it’s time to put these things to work.

Art Supplies Haul May 2019

0