I’ll get this out of the way – I spent absolutely nothing on art supplies in February.
That’s not to say that I didn’t add anything to my substantial wish list, and neither does it mean that I didn’t receive any art materials either!
Last month I finally got my last bottle of Jacquard Solarfast from my December order from Homecrafts. It was out of stock and took ages to arrive, but as I wasn’t able to work over the last few months it wasn’t a big deal for me.
But it did arrive at last, so now’s a good enough time to show you all of the colours and what I think of them.
If you don’t know how Solarfast works, it’s a UV dye that reacts to sunlight. I did a review of Inkodye, which is a similar UV dye product that is no longer available, but I’m now moving on to trying Solarfast instead.
They look fantastic all together, and it’s made me want to jump straight back into the banknote printing project.
One of the things I bought back in December was a set of squeezy sauce bottles from eBay. The plan for these was to use some of them for dispensing mixed screen printing ink, and to use the rest for the Solarfast and Inkodye for screen printing.
But the problem with using these for dispensing thickened Solarfast is that they would let the dye become exposed over time. My solution to that was to use black electrical tape – we got a pack of three rolls from the pound shop – to wrap the bottles and block light whilst storing the ready-mixed dye.
Guess what – it works very well, and I’d definitely recommend it!
This won’t be a full review of Solarfast colours and screen printing with Solarfast, because I did a little test, and realised that I needed to do quite a bit more on different materials. That full review should be coming soon, and I’ll link to it here when it’s ready.
First, let me talk about the language at play here: I love the idea of having so many art materials dropped on me that I have to haul them away. Strenuously dragging my swag back to my lair!
In reality, most of the swag is delivered after clicking a button online, but never mind. The dream is alive.
Also, I’ve never watched an art supply haul video but I am aware that they exist. I can see the appeal to some people but I’m not into it unless it’s one specific product that I need to look at before buying – I just want to buy the stuff and roll around in myself rather than watch someone else. So here goes!
And to add to this, this swag list will include materials I buy for my other half (since I’ll probably be nicking some off him in the near future), and equipment we buy to share between all of us. There’s a lot of art making, engineering and crafting going on in the house, so here’s a peep.
I was hovering around whether to get this just yet as I’m not ready to start printing, but I was tempted by a TopCashback offer to make it just a bit cheaper… and it’s the only colour I need after last month’s ink-buying spree.
Firbon A4 paper cutter
This paper cutter is a pretty handy piece of kit, and a pretty good replacement for the little guillotine that served me well for a decade before breaking last year.
Although it’s entirely made of plastic, unlike my old one, it does the job pretty well and there’s almost no chance of slicing off any parts of anyone’s anatomy, again, unlike the old choppy guillotine. Annoyingly, Amazon now has it on sale at £7.99 – £2 less than I paid for it!
3 rolls of 3M masking tape
I actually got these from Lidl for £2.49 and couldn’t quite find an exact equivalent online. Ste didn’t get why I would jump at masking tape but I’ll be going through a ton of it when I get back to screen printing – all the screen edges will need to be masked, and more.
One thing I know is that with all-purpose consumables, even the boring ones, is that you have to grab the bargains whilst they’re hot, because you’re going to use them up eventually!
Worbla sheet – 75cm x 100cm.
A couple of months ago I’d never even heard of Worbla – it’s a thermoplastic material that comes in a sheet and can be shaped and reshaped by heating it.
I got this one as a present for Ste, so he’s got it stashed away in his workroom. I’m really looking forward to seeing what he sculpts with it, and let’s be honest, I’m looking forward to pinching a bit to see what I can make too!
This roll cost £26.08 at the time and was shipped from Germany; it seems it’s pretty big over there and not as well known here.
Art supplies haul total cost:
£50.55. Not bad, I think; I did a lot more damage last month, but I hadn’t started this then! Will sharing it help me spend less? Or goad me into spending more?
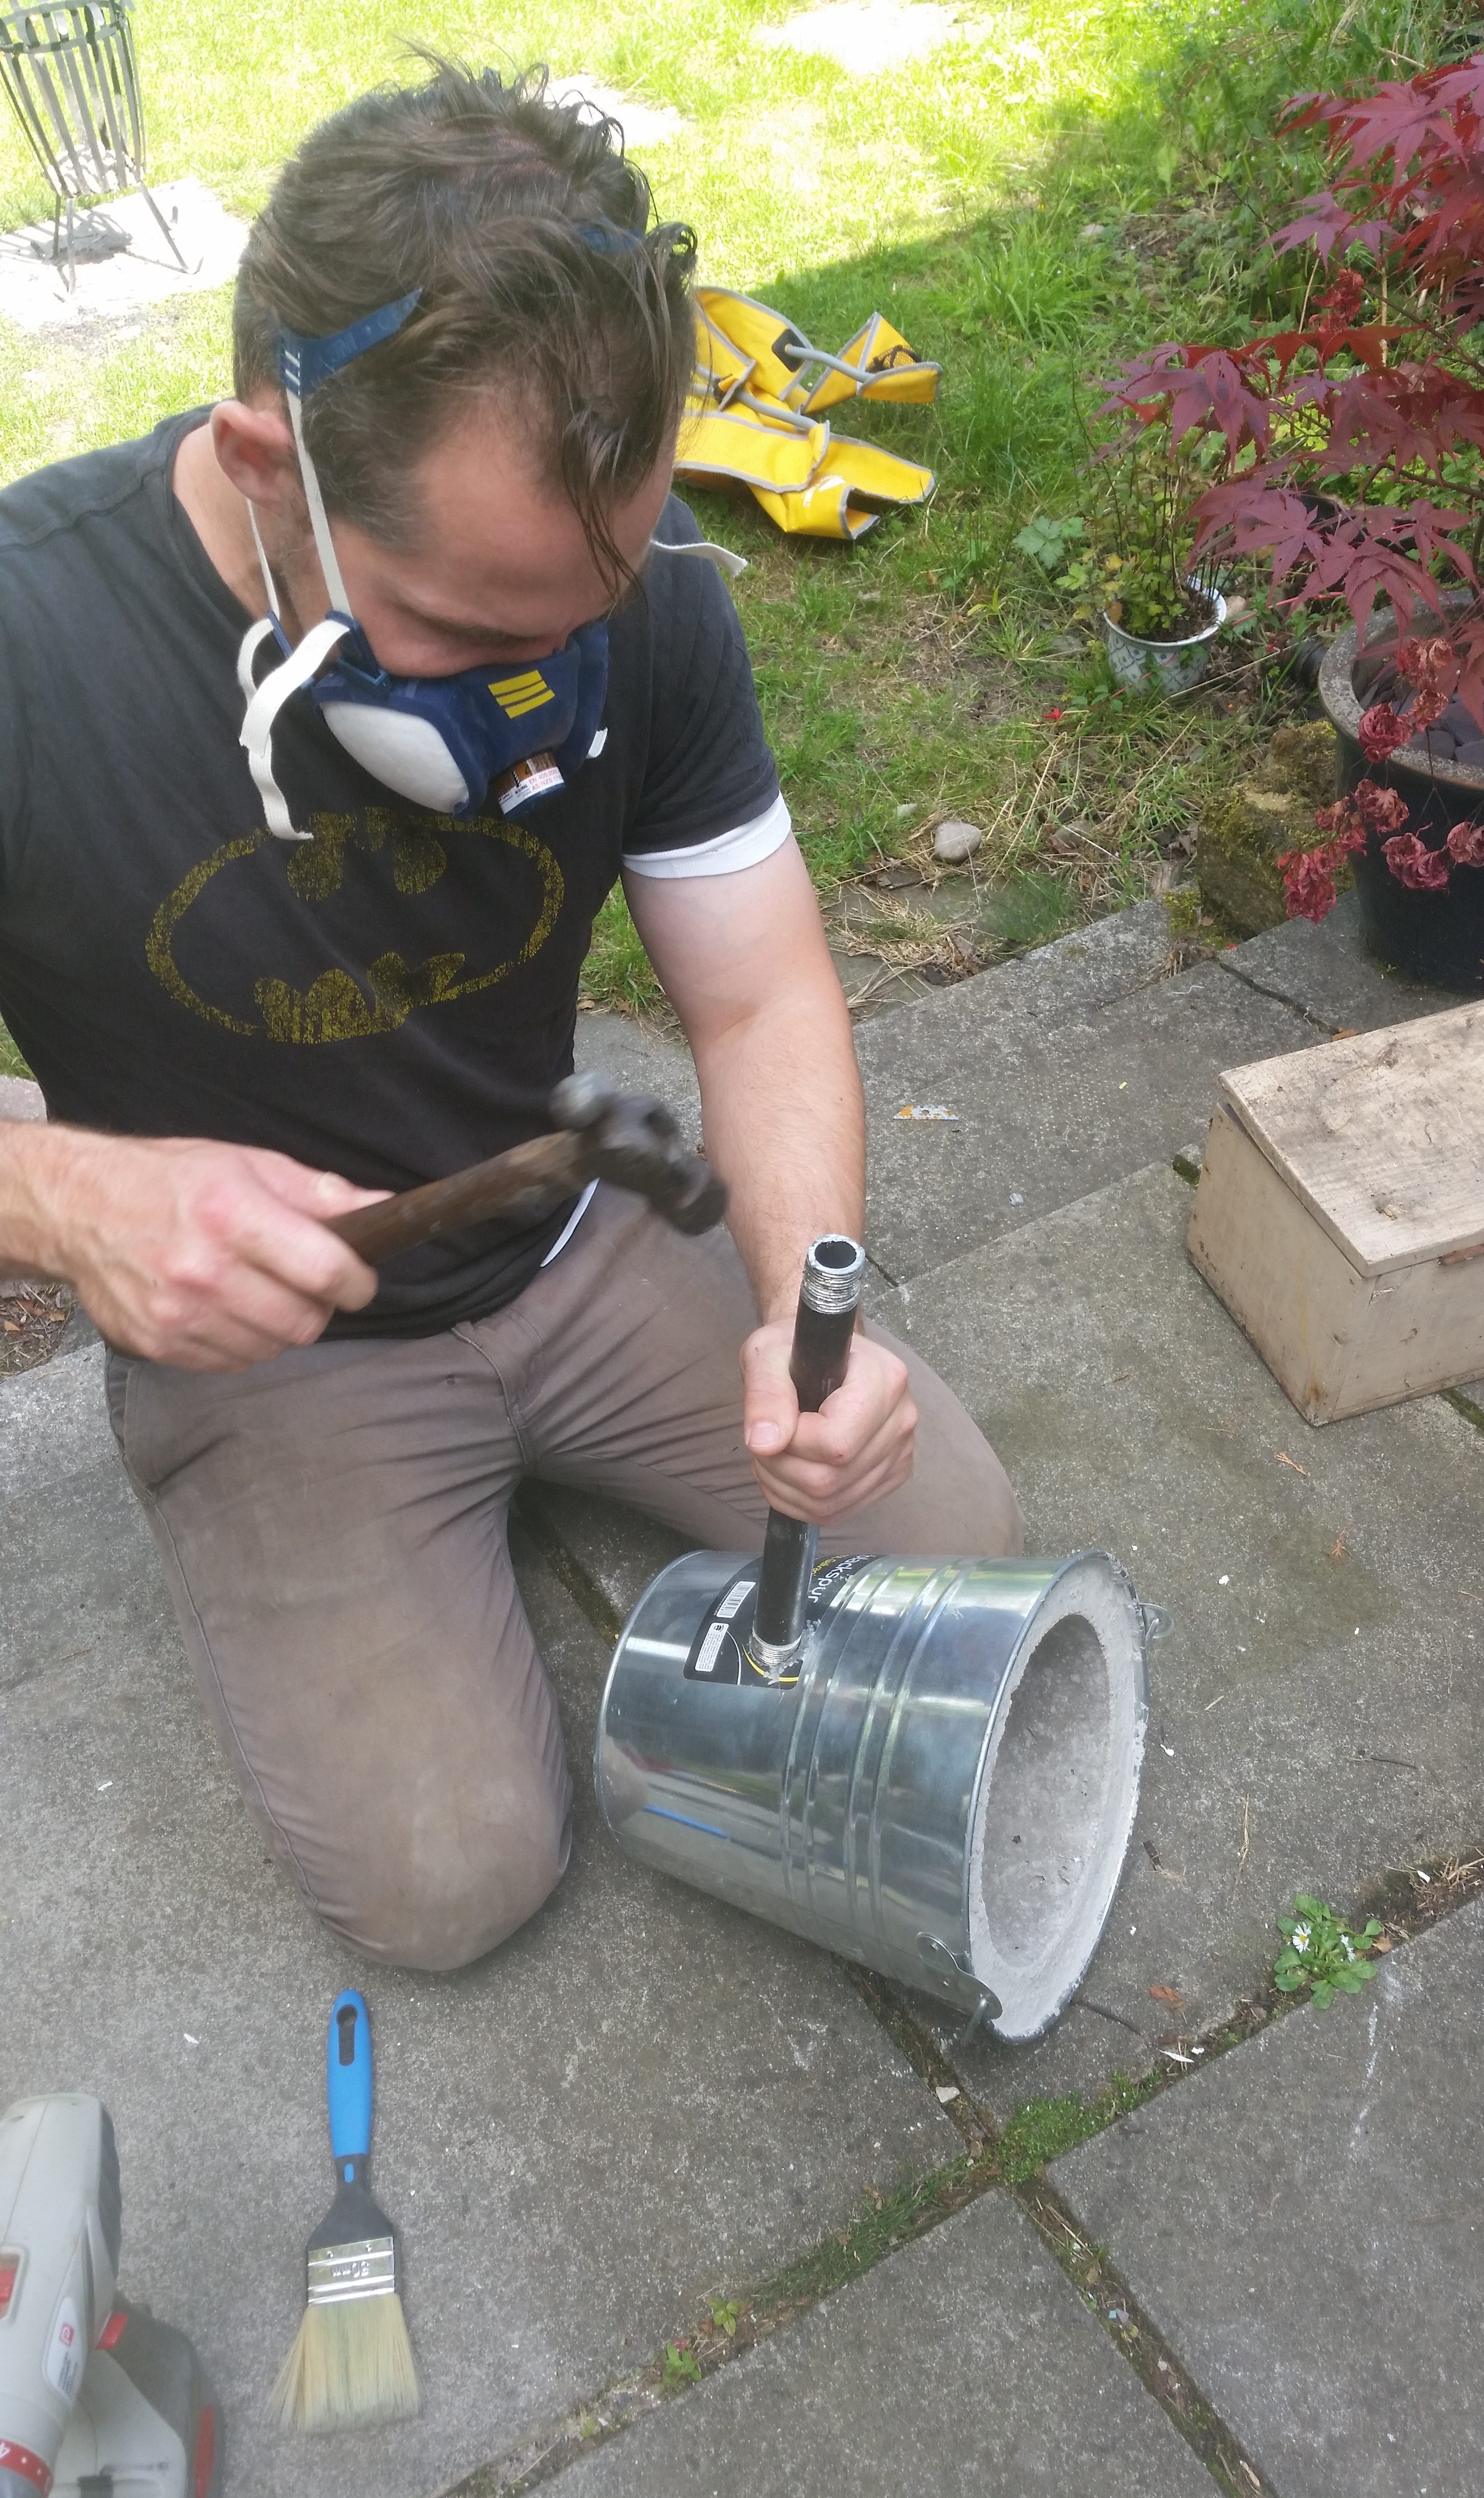
This week in the studio we started a long-awaited project: building a charcoal-fired backyard foundry in a bucket. Now, most of my projects carry on over several weeks, if not longer, but this project is definitely not a one-week wonder.
I think there will be several more weeks of updates as we refine and add to it, but this week we made a start of buying and scavenging all of the pieces, putting them all together and testing it out.
For the fuel, we used regular lumpwood charcoal, bought from the pound store for £1 per bag, of course.
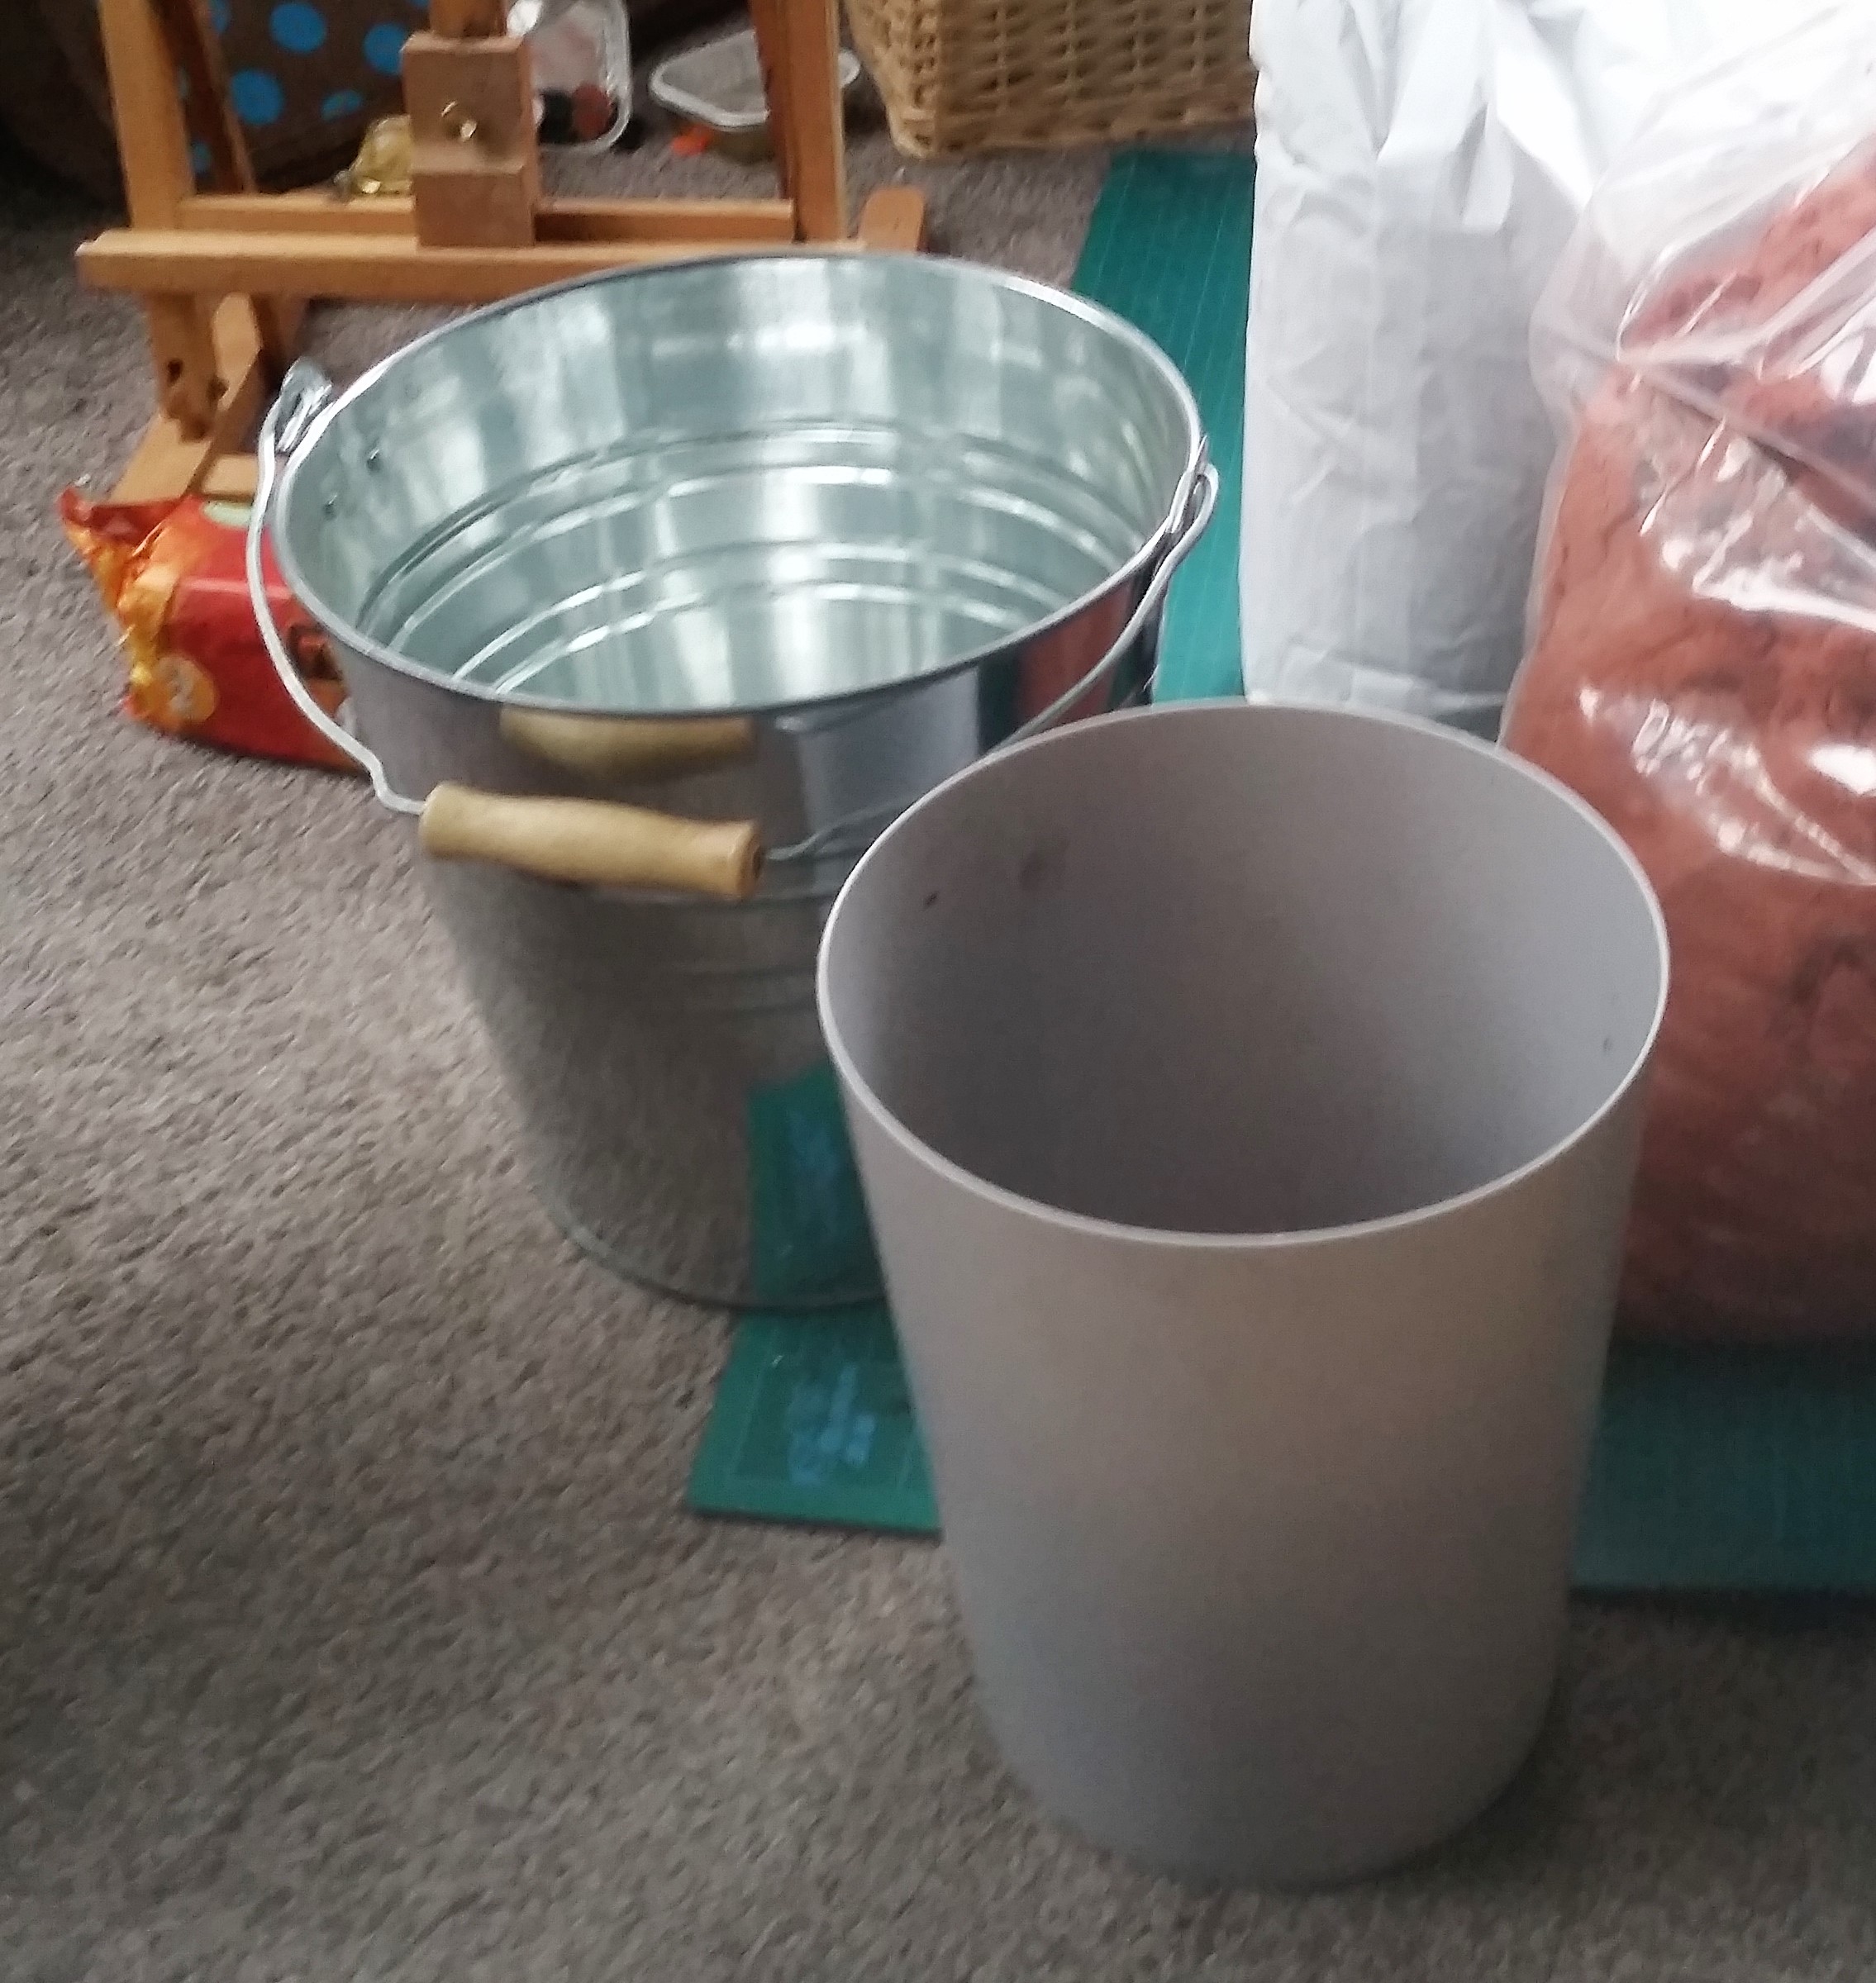
The bucket
We picked up a galvanised steel bucket (like this one) and small plastic paint kettle from The Range in order to cast our refractory cement and form the body of the forge.
The refractory cement we used came in a 25kg bag, and we got it from a local foundry supplies merchant. (I know, what are the chances of having one in my neighbourhood, right?) They also sold us a huge bag of oil bonded sand and a graphite clay crucible.
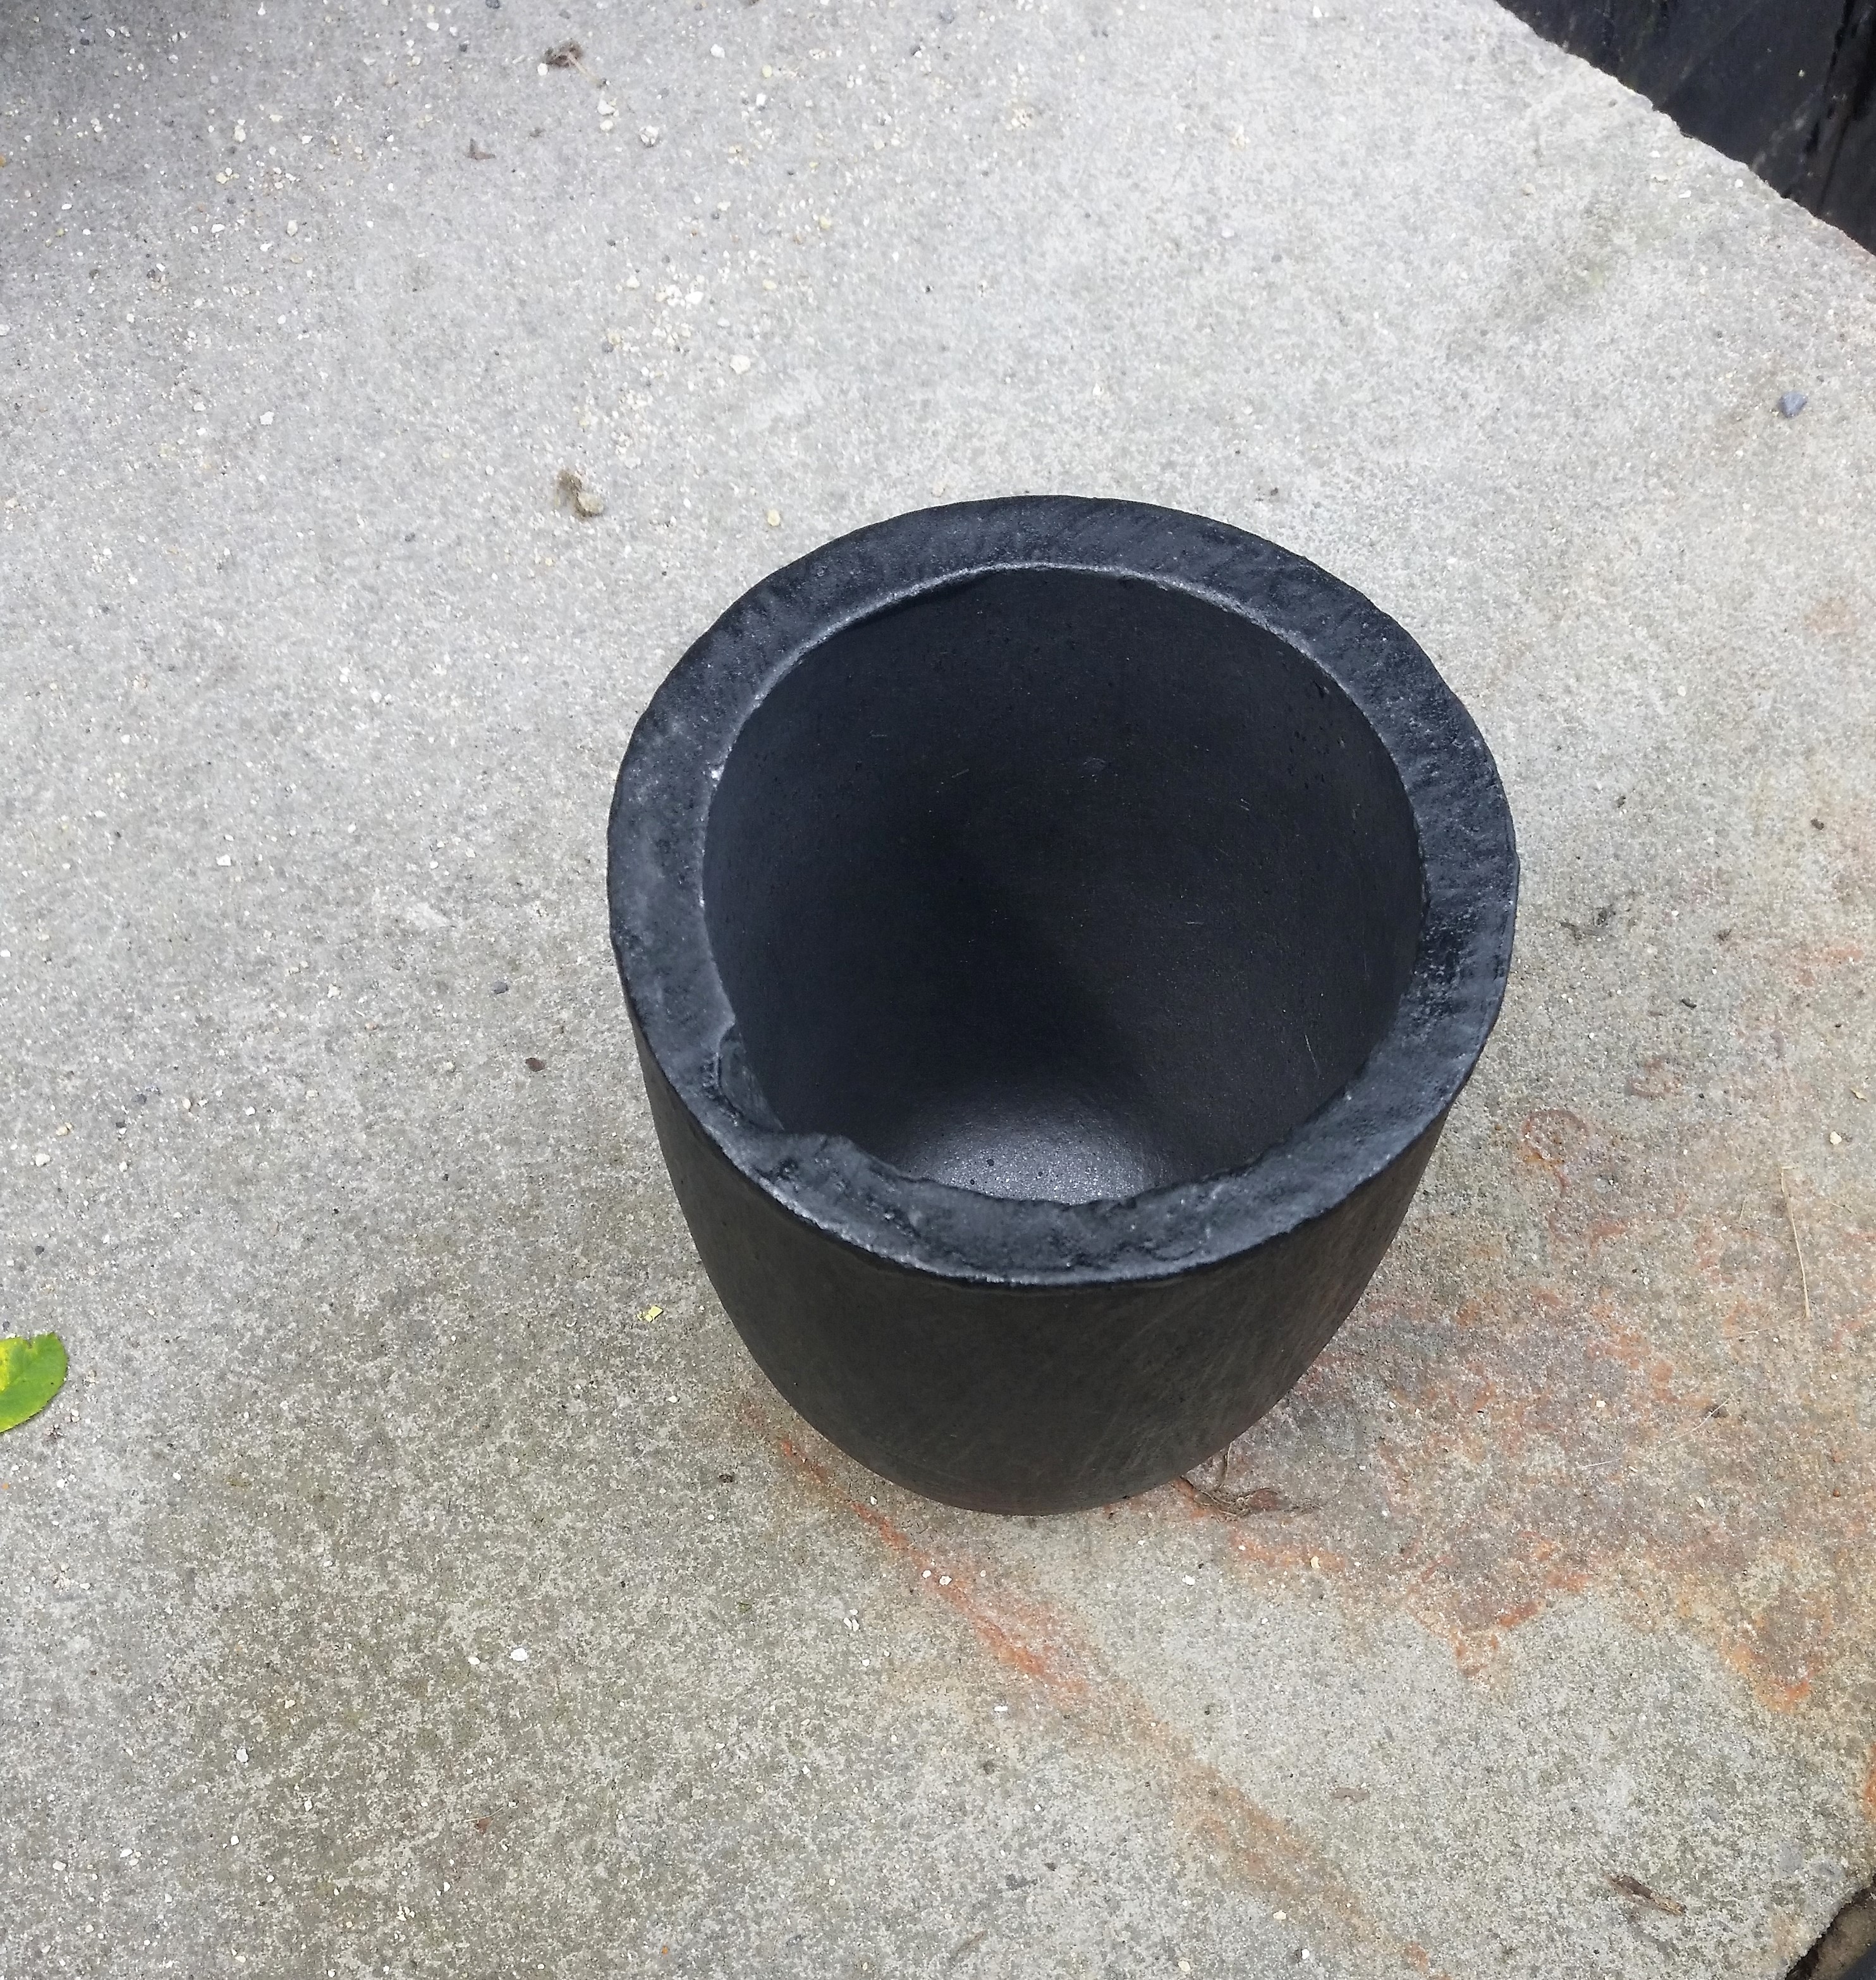
The crucible
The crucible itself cost £30… we were happy to get a decent one and not attempt to DIY it from some salvaged steel, as we plan to do it properly (as properly as can be done in a bucket) and don’t like the idea of a crucible failing.
The lid
We made a lid for the foundry by pouring some of the cement into a circular frame and embedding some scavenged handles into it. A bit of extra cement went into a plastic food container and made a handy slab that we used to cover the lid entirely.
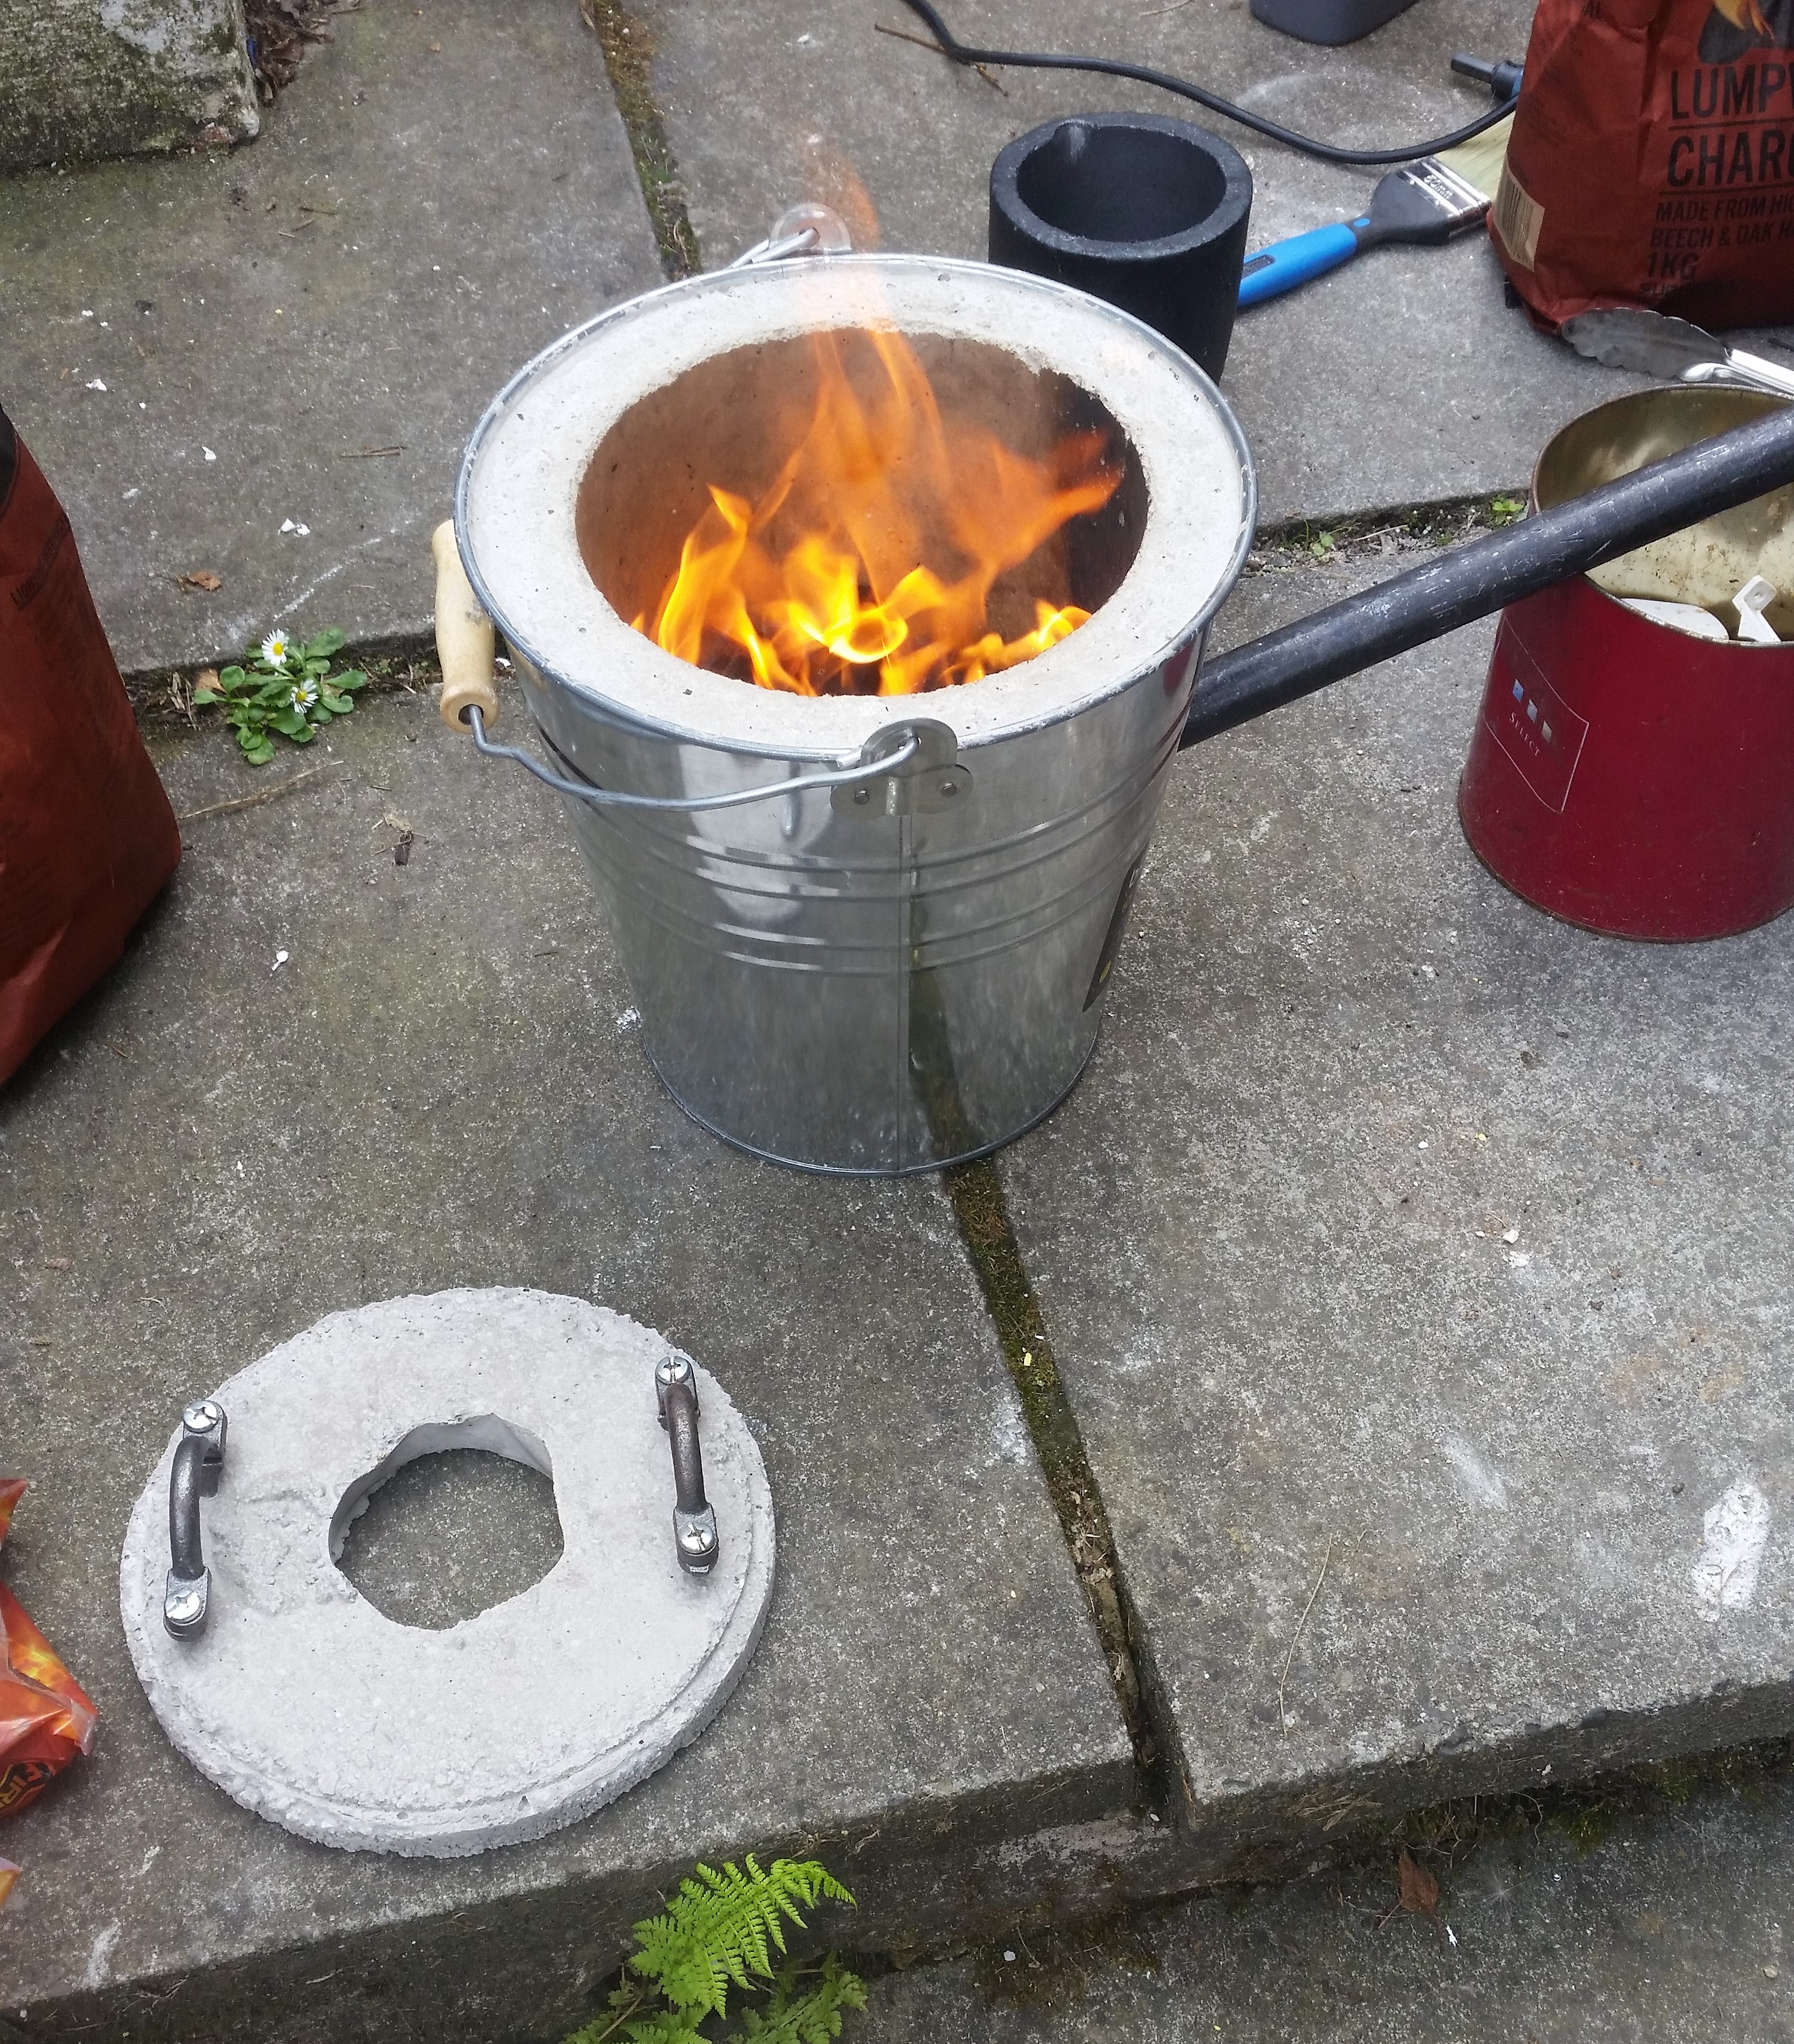
The central hole was made by placing a plastic cup onto the board before pouring the cement, but it crumpled under the weight and left a wibbly outline. It took a fair bit to fill the bucket, but there’s still plenty more left over for more projects – maybe a small kiln?
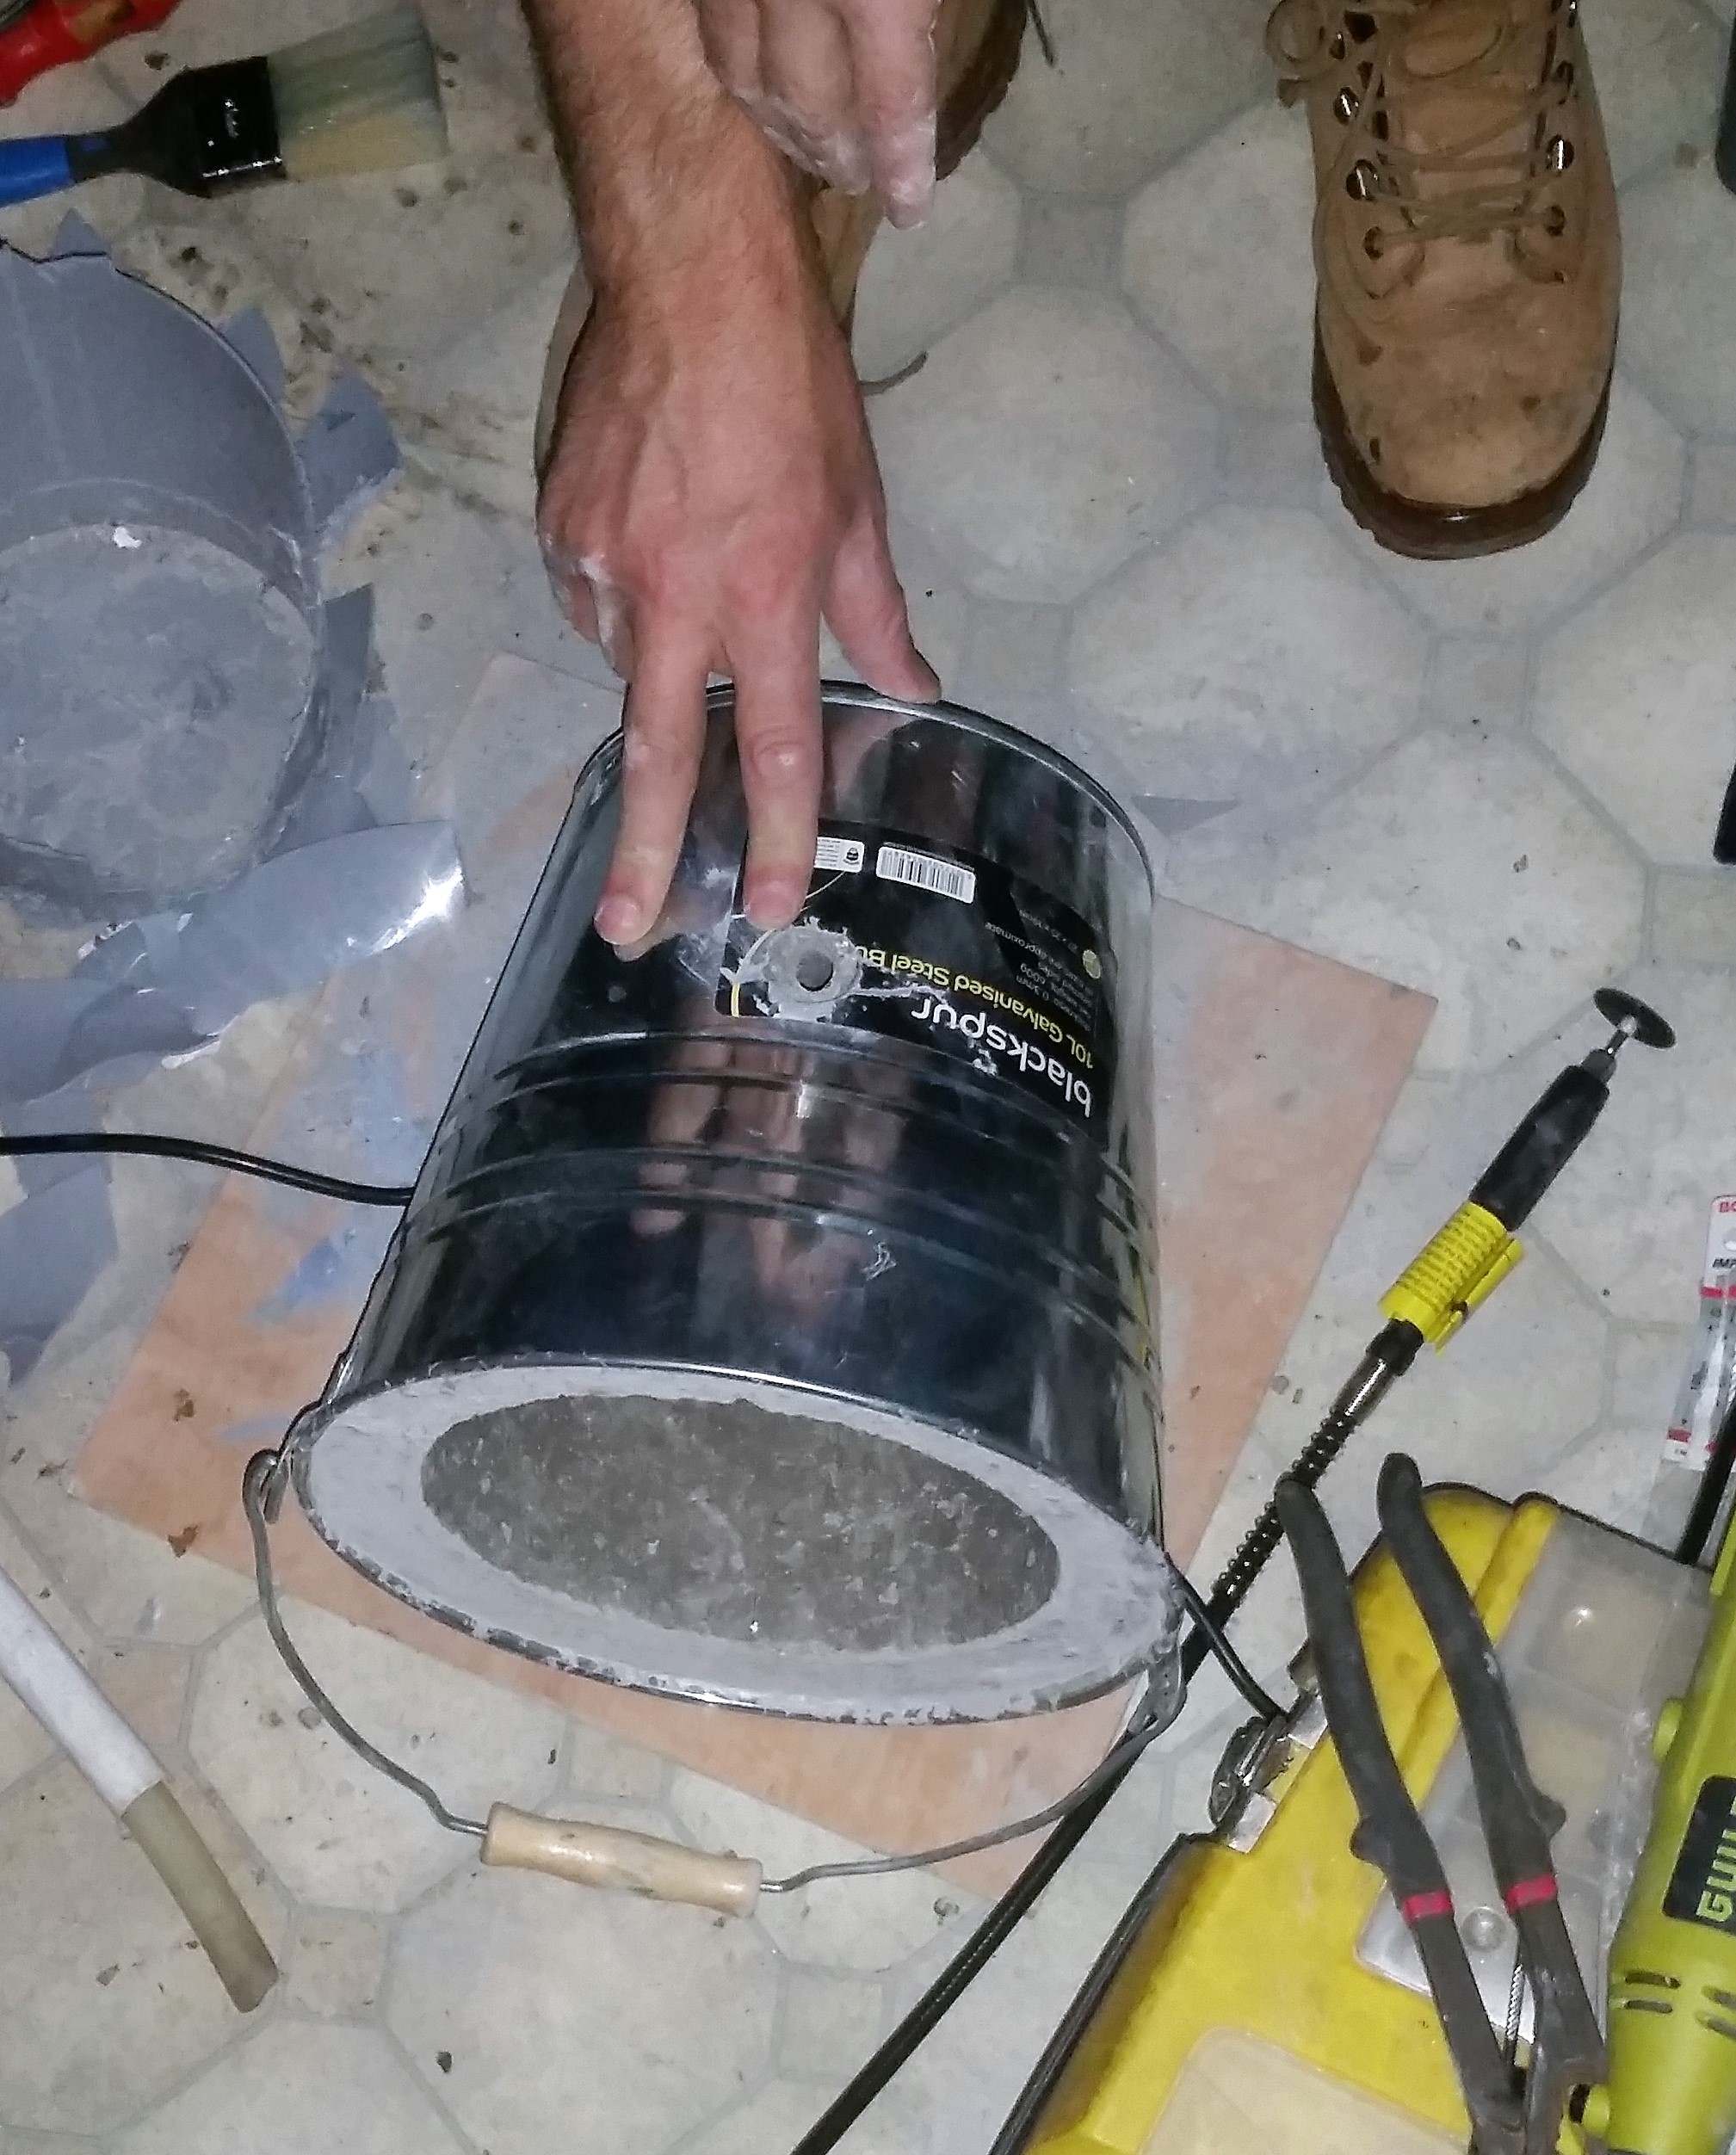
Powering the furnace with a hair dryer
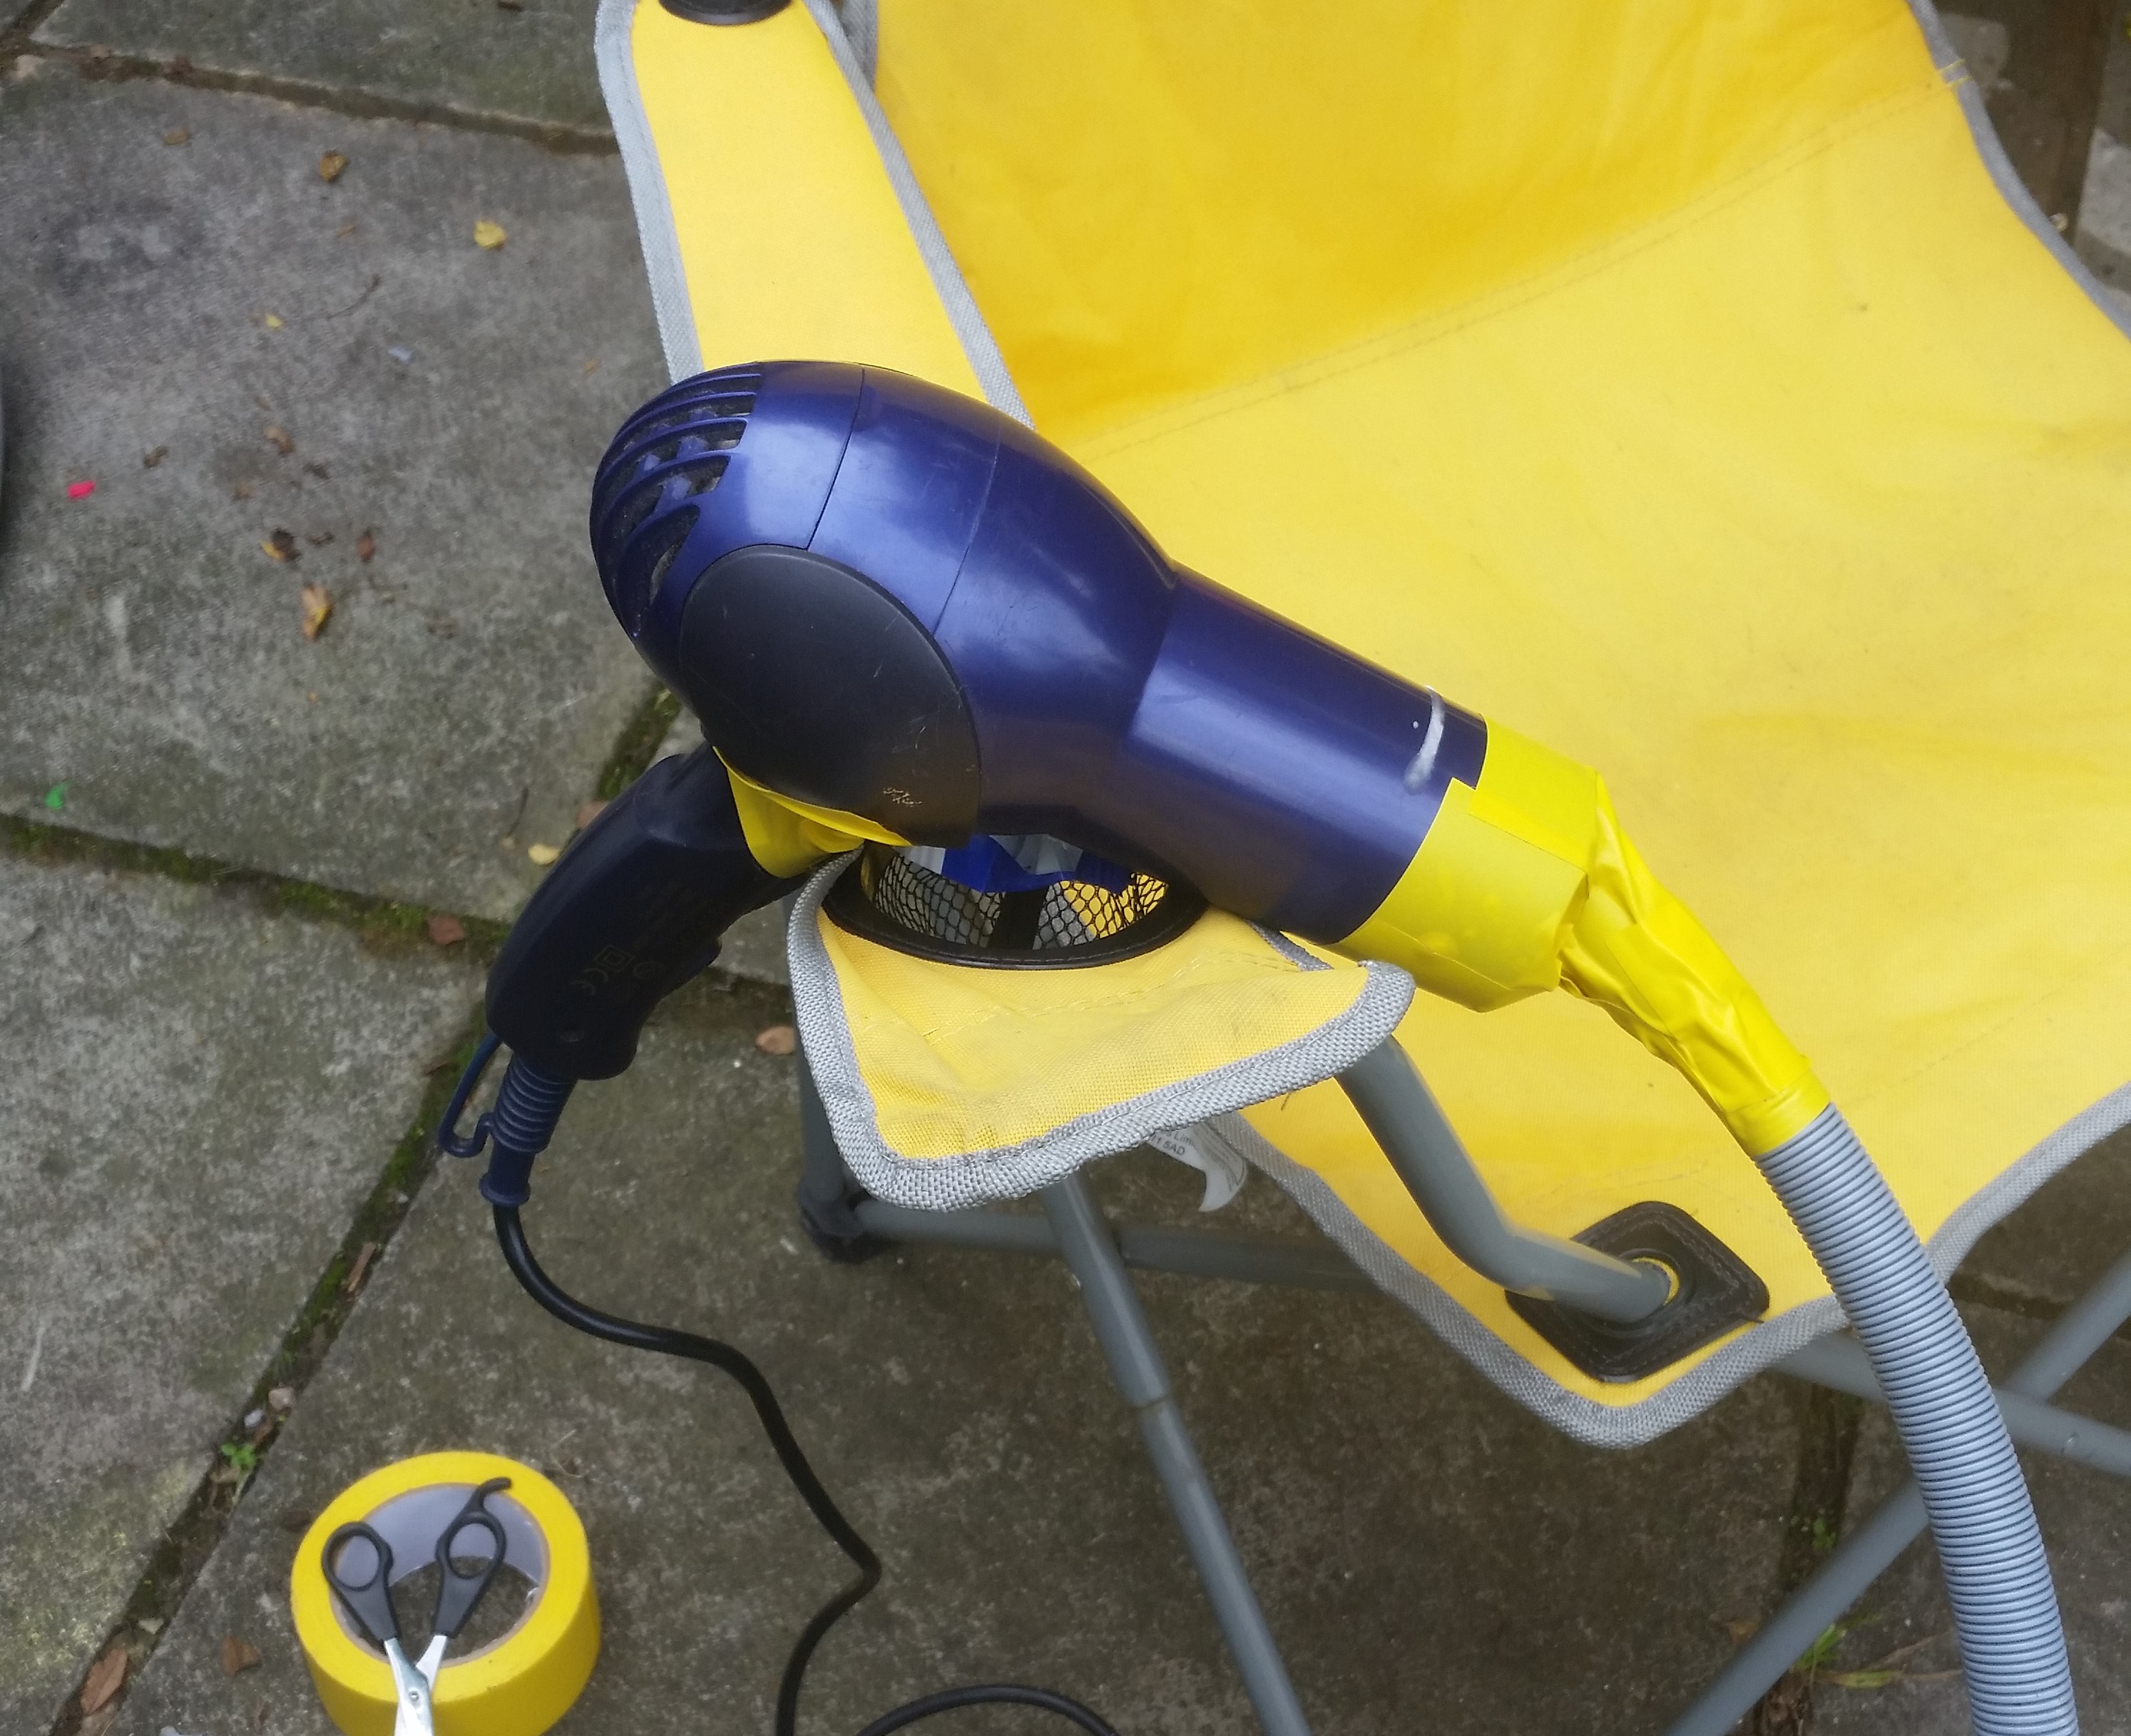
We were told (by YouTube) to connect up a hair dryer via a pipe and steel tubing to blow air into the furnace. The problem was, the hair dryer got too hot when taped to the pipe, even with holes cut into the tape.
Blowing air directly into the steel pipe worked, but it didn’t get very hot. It was only when we abandoned the pipe altogether and blew the hair dryer directly into the air port that we got the foundry hot enough to bring the crucible up to temperature.
First firing – tempering the crucible
Firing up the foundry for the first time was exciting, but we knew we weren’t going to start melting any aluminium straight away. We had to temper the crucible first – bring it up to glowing red hot and let it cool down again.
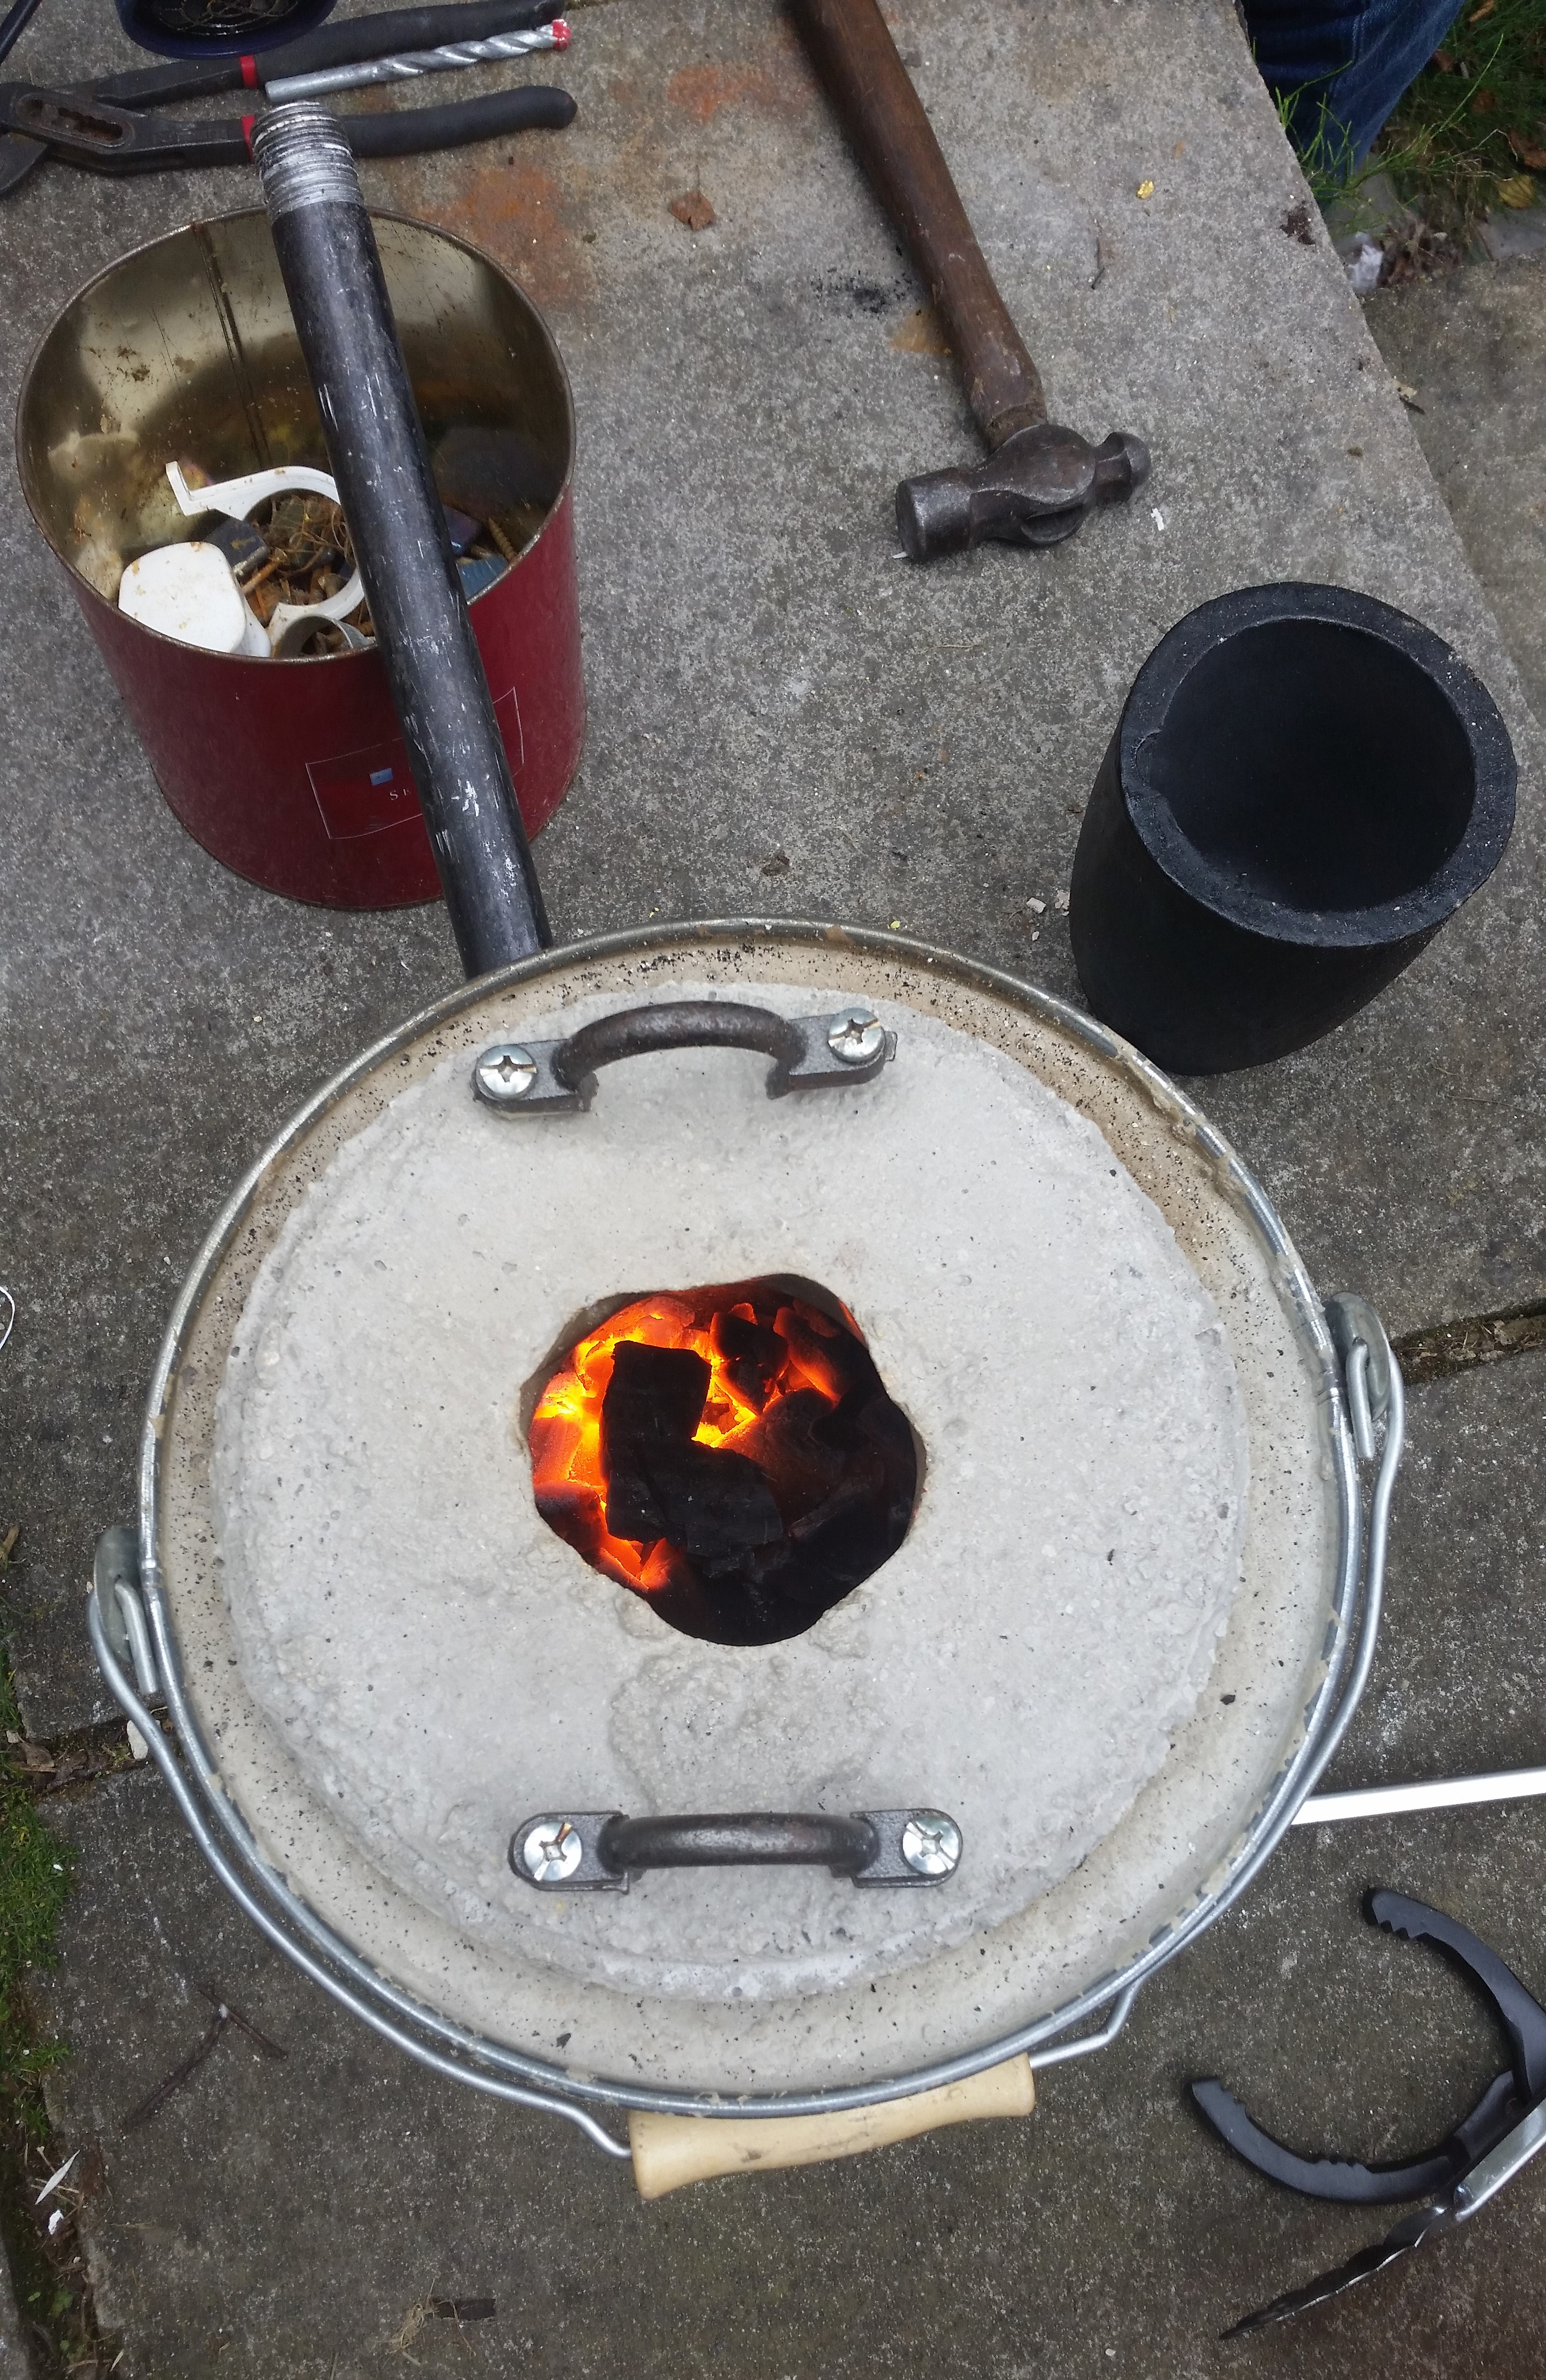
The heating process took a lot longer than we wanted it to, because, basically, we had to figure it out as we went along. The air supply issue was critical to the foundry heating adequately, and when we got the right amount of air blowing in thanks to the hair dryer being up close, it really took off.
Cooling down took all day though, and I’m not kidding – even into the night, the foundry was hot! The handle was cool enough to carry it indoors though. That residual heat came in handy for lunch though – I managed to cook an egg on the top of it and even cooked hamburgers in a flash, before our separate barbecue could even get up to temperature.
It looks as though metal melting days will be barbecue days as well! Next step will be to start melting our scrap aluminium and casting into ingots.
I was given a Lumi Inkodye Sunfold kit by a very generous friend, and I finally had a chance to play around with it during a recent heatwave. After waiting for ages to try it out, I was totally hooked!