Studio Notes 15/02/20 - Designing Coins. The coin project has been rumbling on for a year, but this week I made my first real 50p-sized coin prototypes.
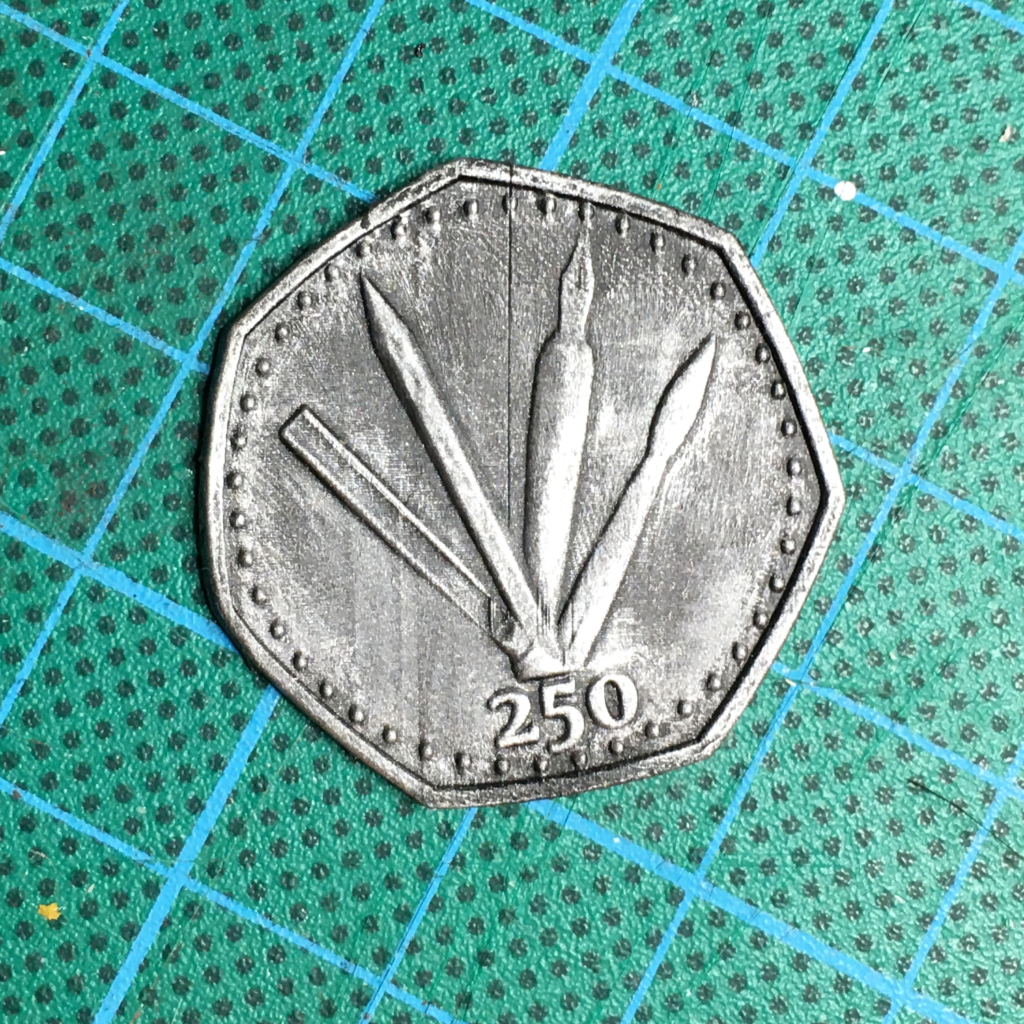
The coin project has been rumbling on for a year, but this week it turned a corner. I found myself looking at my first real coin-sized prototypes: incredibly detailed and almost identical to a 50p, but entirely designed by me.
Designing coins is a bit complicated
I feel so excited by being able to hold these tiny creations in the palm of my hand, but a little conflicted as well, as there’s still some work to do in sharpening up the portrait and reverse details. It’s been a challenge figuring out how to sculpt in low-relief in Blender without losing crispness, and when it comes to the face, I haven’t cracked it yet.
Things that look good when they’re big can entirely disappear when they’re scaled down, and trying to fit everything into a circle is strange.
Fitting the medium to the message: when the materials don’t work
The good news is that 3D printing has liberated my ideas, and I don’t have to stick to making big medallions that function as coinage unless I want to. I can make coins that have the same scale as real life coins, which takes the concept further into the uncanny.
The bad news is that I’m printing resin pieces that are still resin pieces. To get them to represent coins, they’ve got to be camouflaged by something that mimics metal. It’s still not metal though, and for all of the factors that made my previous coin into something that was an approximation of a coin – scale, accuracy (and the fact there was only one), at least it was made of metal. It was heavy, and it felt valuable.
These little resin coins aren’t hefty, and in a blank grey, they don’t have the aura of value. So what can I do about it?
From here I could use my printed coins to make moulds and cast them in pewter, or I could just print them in resin and give them a metallic finish (my husband painted the coin above for me). Or maybe I could electroplate them.
One consideration is that the fewer processes I need to go through, the more I can make. The good thing about making a high volume of these pieces is being able to experience them in the way that we experience real coins: en masse. Or maybe they’re about to become rarities due to the looming cashless society?
All that’s to say that I don’t know what to do yet.
Making replacement joints
One thing I’m particularly proud of this week is designing and printing my own replacement wrist joint for my articulated figure.
The fake Body Kun had awkwardly formed ball joints at the wrist that never seemed to align with the hands, and never fit the hands’ sockets. A few months on, the left wrist snapped, and I had to style it out with a Blu Tack “plaster cast”.
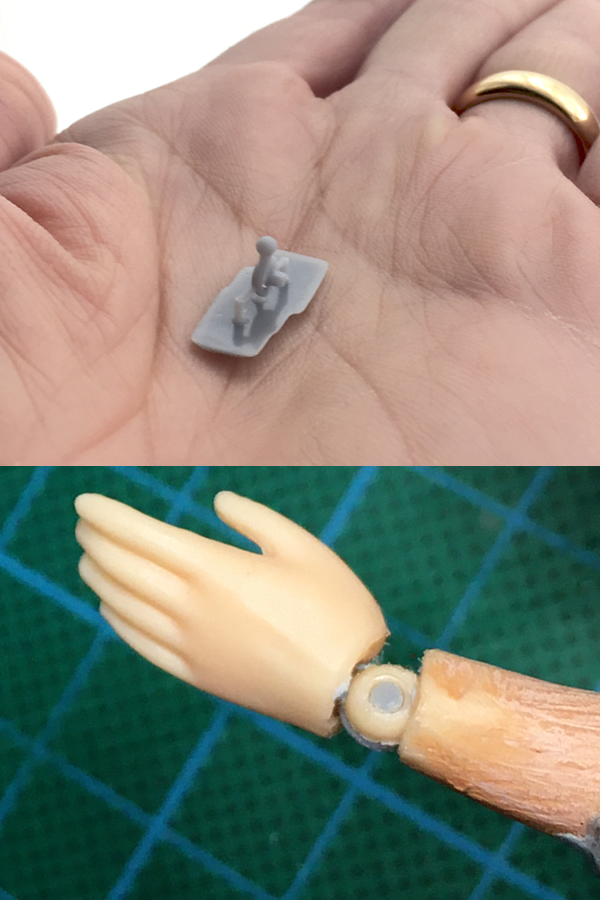
My confidence with Blender is at the point where I could design a new replacement ball joint that actually works! The only thing I’m worried about is the strength of the resin itself, as it’s quite brittle, and on this tiny scale it’s likely to snap again.
I’m just going to add one of these joints to each print I make for a while to keep them ready to swap out if need be.
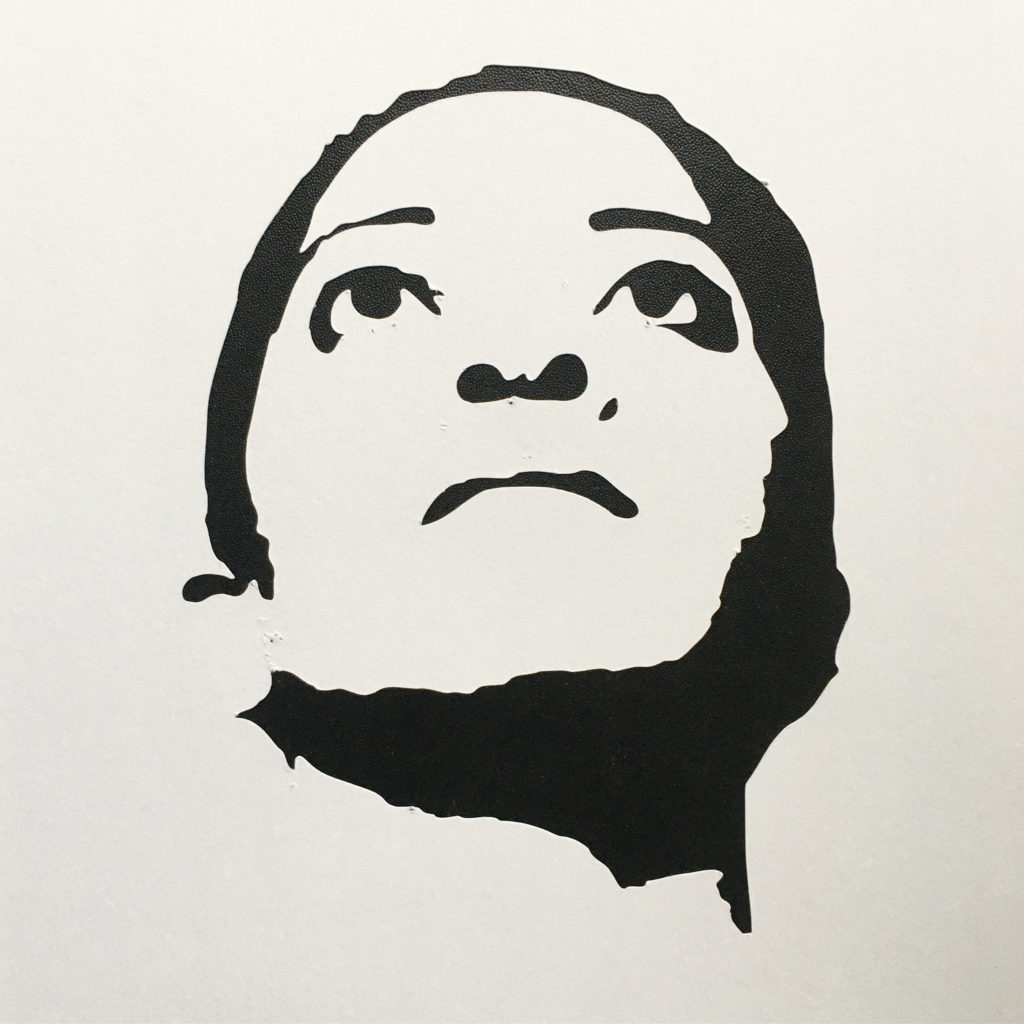
My weekly portrait is another stencil, but I really had to work for this one. I used one of the photographs I’d taken for my Facebuilder mesh and reduced it to black and white, then converted it to an SVG in Inkscape. My poor cutting machine couldn’t cope with the high detail though, so after a bit of running around and problem solving, I managed to make it simple enough to work.
* denotes affiliate links
Leave a Response