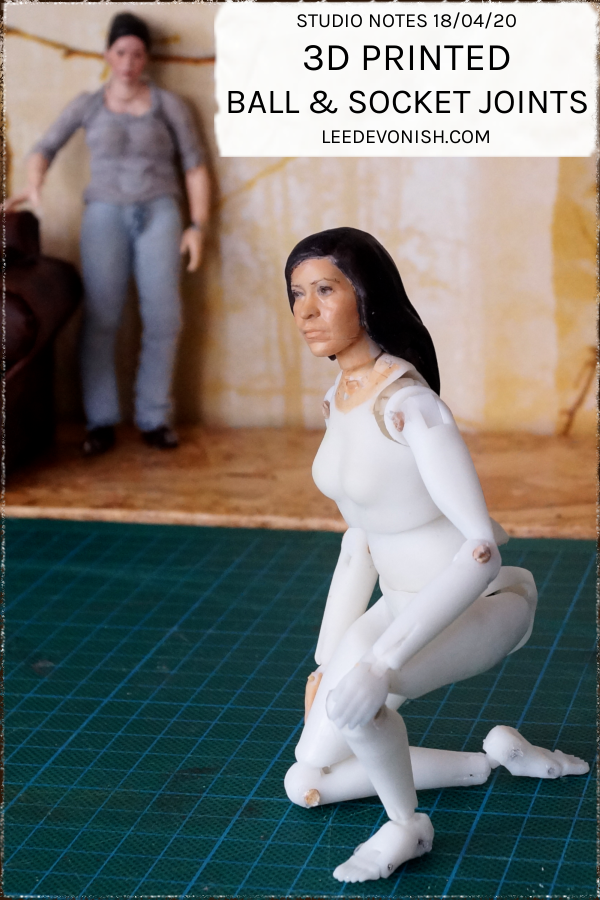
Studio Notes 18/04/20 - after redesigning my 3d printed ball and socket joints, the full figure is stable, poseable and ready to be painted!
After putting together last week’s prototype, I felt as though I wanted to make a few improvements on the joints, so I designed my own 3d printed ball and socket joints that wouldn’t fall out.
But besides the joint success – can I just jump up and down at the end result? My figure is finally all together! Sure, I need to trim the bamboo cane pins and paint it up, and make new clothes, but I finally have an articulated figure that I’ve made entirely from scratch.
Adjusting the design to the materials
My biggest problem with the joint design for my figure has always been getting a flexible joint out of an inflexible material. The resin has never been able to work with the joints I’ve found on Thingiverse, as they’re designed for printing with filament, which has a bit more plasticky spring to it.
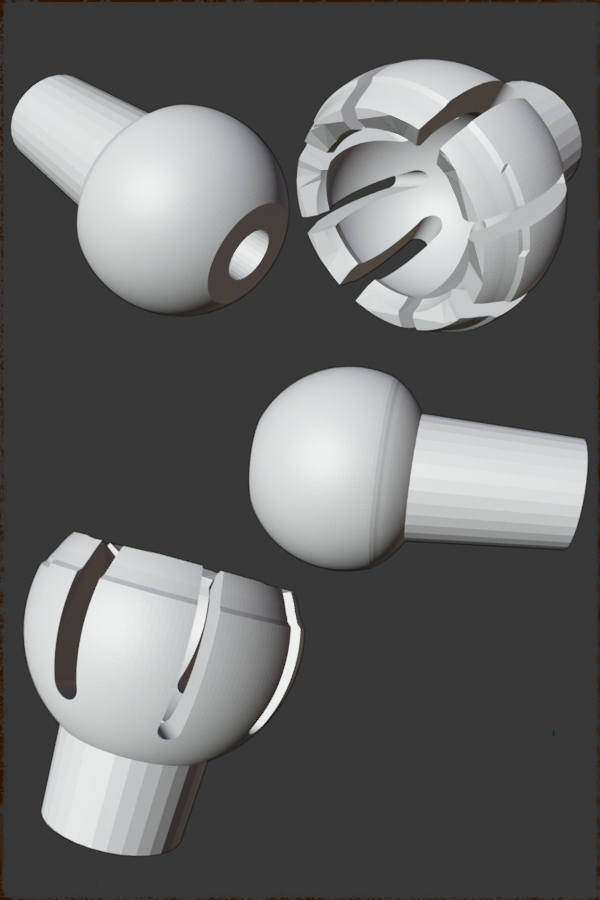
To get around this, I cut more grooves into my sockets to allow them to spring apart slightly over the ball.
The biggest change I made to the standard cup-and-ball design was to flatten the top of the ball and to flatten the base, allowing the cup to curve around the base slightly. This stops the ball from falling out.

Print-in-place joints
I read that some 3D printed ball and socket joints are actually printed in place, and I was very tempted to try this, but to be honest, the thought was terrifying. There are so many areas needing supports and lying at different angles that I couldn’t try it at this small scale, but I might try it in the future when I don’t feel under pressure.
The one thing I had to tweak after printing was the wrist socket joint – I hadn’t built in deep enough cuts in the forearm to allow the socket to spring over the ball, and the first arm I tried snapped. I did manage to tape it up, but it was easy enough to change the arm file and reprint it the next day.
These joints are in the neck, shoulders, hips, pelvis and abdomen. The wrists and ankles have tiny versions of the same joints, but with the sockets embedded into the limbs.
Until I can get flexible resin, I’m going to have to stick to the size of model I’ve printed recently. The tiny joints in the feet (overkill, I know) would be entirely unmanageable at 1:12 scale, and the hands as well.
I’m losing out on the cute factor, but gaining something in character, and that’s got to be good, right?
Net week I’ll show you the tiny hands!

Painting the latest printed head as my portrait of the week was a heck of a lot more successful this time… I think the photographic treatment adds to the weird uncanny quality that I’m messing around with.

* denotes affiliate links
May 9, 2022 at 3:32 pm ·
Hi. Can you share some measure or hint to create the join in a 3d software?
January 12, 2026 at 2:16 am ·
Do you sell these joints? How small can you go? Looking for 2/3 mm, for miniatures
January 23, 2026 at 9:51 pm ·
Hi, sorry, I don’t sell them. It was a personal project prototype.